This Photoshop article basically describes a color replacement, done a bit differently than earlier. This time we rely upon color channels and blending modes to develop a red tulip into a black one – without any horticultural skills.
Load the photo in Photoshop
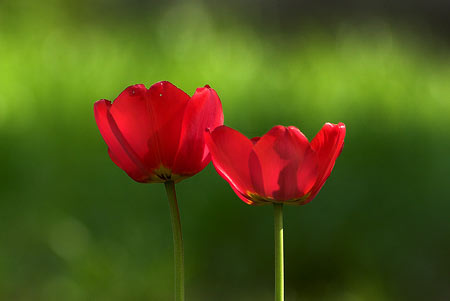
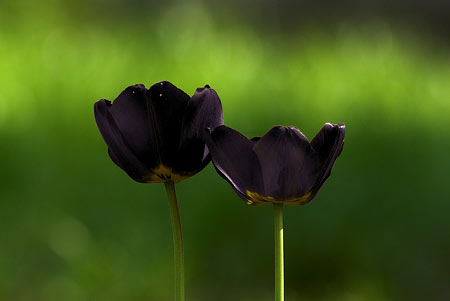
We know, we know. This picture had already been used in our articles, but it was such an obvious choice for a color swap that we had to reuse it. When working with a picture of your own, try to choose one that has clearly red objects that strongly stand out from their environment. It can be a flower just like in this article, with a green background. Or a fruit ripened red.
Channel search
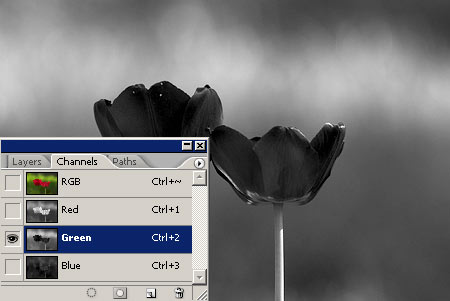
Our first task is to observe the color channels. It won’t take too much observation to find that the originally red areas are the darkest on the green channel, while tones of other areas are the same. So, select the green color channel by clicking its name on the Channels palette.
Copying

Next, copy the content of the green channel. The simplest way to do this is pressing Ctrl+A, then Ctrl+C. It is very important to click the RGB channel after copying in order to select all the color channels again.
Back to layers
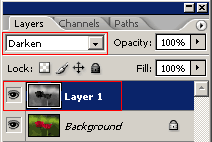
Return to the Layers palette, and press Ctrl+V to paste the previously copied green channel as a monchrome layer above the original picture’s multicolored one.
Now we have to blend the layers so that all the other colors remain unchanged. In the blending mode dropdown on the Layers palette, choose Darken instead of Normal.
Does it look better?
As a result, all the reddish hues in the picture become darker. The clearer reds turn to stronger blacks. This is how a red tulip turns black… in the world of digital photo editing.