Below is a classic color swapping procedure, turning pink lips into blue. All you need is some imagination and a short delving in Photoshop’s selecting and masking tools. In case you skipped the latter, read this article.
Load the photo
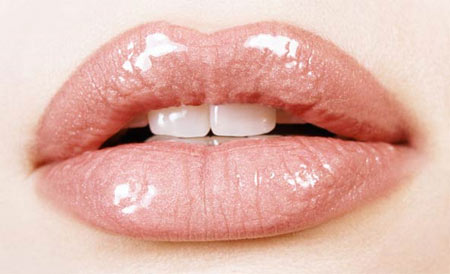
Choose an appropriate image and open it in Photoshop. We’ll be using just this part, since this is the area we’ll be working with, but you may want to edit a full portrait.
A new layer
First, duplicate the existing layer by clicking Layer/Duplicate Layer. Stay on the top layer. This is where we’ll change color of the lips.
Rough work

You’ll have to select the contours of the lips so that the color change will affect only these areas. You needn’t be accurate per pixel. Select the Polygonal Lasso Tool from the tools palette (press L), and with bold clicks, select the mouth all the way around.
Mask on the mouth
The selection basically creates a masked area, and Photoshop changes the picture only inside the selection—that is, outside the mask. In order to make the change plausible and natural-looking, you have to adjust the selection a bit. For example, by blurring its edges.
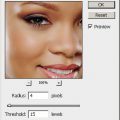
The easiest way to do this is using the Masks palette. If it’s not displayed, use the Windows/Masks menu item to make it visible.
In the to right corner, click the Pixel Mask icon, then slightly increase the Feather slider, just by a few pixels. This blurs the selection edges. 3 to 4 pixels of blurring can be sufficient.
Layer mask

By returning to the Layers palette, you can see that the upper layer is accompanied by a black-and-white layer mask. The areas marked with white are the ones where you can work—these will be affected by the color adjustment.
To change the color of the lips, click the indicated icon at the bottom of the palette, and in the dropdown, select Hue/Saturation. This creates an adjustment layer above the existing ones, which will adjust hue and saturation values. These will affect the layers below.
New color for the top
Since you only want to apply the color change to the upper layer containing the mask, click the marked icon on the Adjustments palette which contains Hue and Saturation settings. This way the change will only affect the image layer directly under the Hue/Saturation adjustment layer, but not the one at the very bottom. This means only the selected (masked) mouth will change in color, the skin and the rest of the face will remain untouched.
Finally, use the Hue slider to change the lips’ color to anything you like. Color intensity can be adjusted with the Saturation slider.
Blue make-up
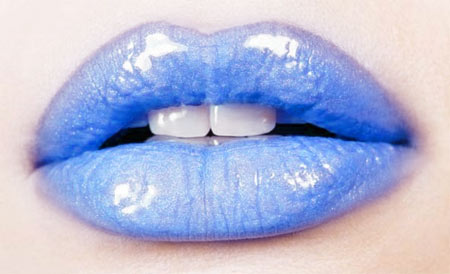
The lips turned blue, due to the changes you made above. Of course, you can try any other color—even black, if you’re artful enough and know how to deal with the Lightness slider.
Thanks to the mask, the rest of the face is not changed, and the blurred mask edges provide a soft transition, and as a result, a more natural look.