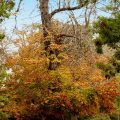
It sure happens in the autumn time that one has to take a photo in cloudy weather, which would definitely look better in the sunshine. The sky is usually dull, grey, or in worse cases, white, at this time of the year. But if you manage to select the important areas, you can easily improve the result.
Step 1: Load the photo in Photoshop
Sometimes the sky does not look its best in a photo taken during an outing. Gloomy, grey photos are looming over and they strip the sky of colors.
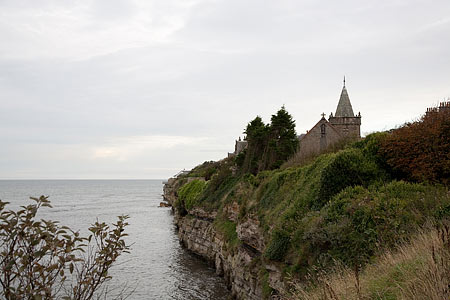
All you need to do in such cases is to select the sky area as much as possible, and in our case the water surface too since the color of the sky is reflected there. When you are done with it, setting the colors is a piece if cake.
Step 2: It and itself
You’ll need to mask the rest of the photo. It’s good to use Image/Calculations menu for creating a quick mask, which will create a mask in a new channel.
For this, select New Channel in Result menu (at the bottom). Our aim is the see the modifiable area, i.e. the sky and the water, in the alpha channel in white, while the rest of the landscape appears black. To achieve this, the darkest – here the blue– channel will have to be united with itself through Linear Light blending mode. We have encircled the essential settings in the window above.
Step 3: Alpha and Omega
When checking Channels palette, you’ll see that there’s an additional Alpha channel too, but the original color channels have not been altered. The alpha channel contains white sky and black landscape elements, so it’s ideal for creating a mask.
Keep the Ctrl key pressed and in the meantime click on Alpha 1 channel. The software will neatly select the white picture parts. Next, click on RGB channel in Channels palette.
Step 4: Softer edges
The effect will be a bit closer to natural if you soften the edges. Click with the right mouse button within the selection area, and select Feather option in the appearing window. It’s enough to give 1-2 pixel value in Feather Radius.
Step 5: Get those blues!
We’ve got the selection ready, now let’s continue with making this area more blue. You can choose from several options. One of them is Image/Adjustments/Color Balance command.
Here, first set the Shadows, i.e. the color of the darker areas. If you shift the first slider to the direction of cyan, and the second slider to blues, the result will be quite a bluish coloration. If you’re done, repeat the same in the color balance of Midtones as well.
Step 6: A world of more colors

We have added some new hues, and the originally gloomy atmosphere has also remained. At last, blue color has also appeared in the photo and only in those places where it was needed.