How to rotate end crop an image in Adobe Lightroom. A picture of any size and position you like.
Icon
![]()
This article deals with Crop Overlay tool at the top of the left-side toolbar in Develop. You can first find it in LightRoom version 2.0, and it is used for cropping or rotating a RAW image.
Click on the icon and a setup dialog opens up below it, offering its major options.
Corners can help you

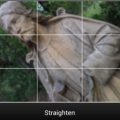
If you select this tool, a grid of thirds appears in the picture. The intersections within the grid help you place the main theme in the appropriate position, and they also come handy when you need to define horizontal and vertical lines.
It’s the easiest to use the Crop Frame pointers in the corners and edges of the image for the cropping. Just grab any of them and drag to the direction you like. The size of the frame decreases accordingly, thereby signaling the new edges of the picture you want to cut out.
The Crop Frame Tool

You can also select a special Crop Frame Tool in the setup dialog. Click with it at any point of the image and then draw a rectangular, which then selects the part you want to crop. You can resize the edges and corners of this part just like in the above description.
Aspect ratio

Setting aspect ratio is another important step, which can be reached in the same tool strip under Aspect. You can select from pre-set ratios in the drop-down menu on the right. It’s usually 2×3 in case of DSLR images, while it is 5x7 in compact images.
If you choose Original, the size ratio will be based on the original image size. Whatever the orientation of the crop frame is, the size ratio remains the same as in the original image. The padlock icon next to the menu serves the same purpose. If it’s closed, the size ratio remains the same as in the original image.
If you aim for a completely unique cropping – say, a thin line-, select Custom or give the values of your preference under Enter Custom. Click on the padlock icon to open it and thereby dissolve the fixed ratios.
Manually

Once you are finished with setting the crop size, you can continue with other editing steps. You can, for example, shift the content within the crop frame. All you need to do is use the keyboard arrows, or click inside the photo and while keeping the left mouse button pressed drag the mouse to any direction within the frame.
You can also rotate the image before cropping. For this, drag the mouse pointer outside the corners, then rotate the image to any direction while keeping the left mouse button pressed.
A decision in numbers

There’s a more accurate option in the setting dialog for setting the rotation. Using the slider above, the image can be rotated with +/-0.01 accuracy, up to -45 – +45 degrees.
If you want a 90-degree rotation, choose Rotate Left or Rotate Right under Photo menu. At the same place, you can mirror the image (180 degrees) horizontally or vertically, using Flip Horizontal or Flip Vertical commands respectively. The 90-degree rotations will rotate not only the image but also the crop frame.
If the horizon slants

Often, you have no idea about the amount of rotation needed, as it is quite difficult to judge whether the horizon slants with 5 or 6 degrees. This is when spirit level icon in the bottom left corner of the options dialog comes handy.
Find a line in the photo that should be completely horizontal or vertical, click on any points of that line, then draw a straight line alongside until you reach another point of this line. In the sample, we chose the bottom edge of the train, which must have been horizontal originally. As soon as you release the mouse button, the photo will adjust itself the horizontal or vertical. If the slant is under 45 degrees, the photo adjusts to horizontal, if above 45, then to vertical.
Variation

After experimenting a little with crop and rotation tools, we finalized settings by pressing Enter. At this point, the setting dialog disappears and only the image with the crop frame remains, with the executed set rotation. The number of variations is endless.