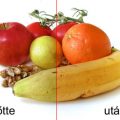
Usually we don’t encourage anyone to reduce the quality of their photos but sometimes you may want a weaker visual effect than the original. This Photoshop tip transforms a color photo to… well, a color photo, but the bright original colors will be thoroughly bleached. Of course, there are other solutions for this. Print your photos or have paper copies made, and put them to a dry, sunny location for a few years. Or decades. Well, if you lack the patience, read on to learn how to do it in a minute.
Open the photo
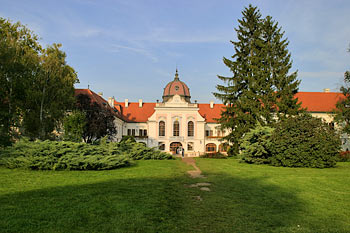
Choose one with lively colors to make the effect more spectacular.
Layer wash
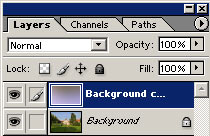
First of all, duplicate the original layer. Click Layer/Duplicate Layer and OK to do so.
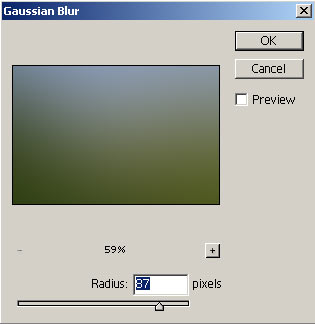
Blur the duplicated layer by clicking Filter/Blur/Gaussian Blur. Set a Radius value that strongly blurs the shapes of the picture but spares the blots of main colors (e.g. the lawn or sky). For smaller images (like this one), use values between 80 to 100. For larger images, use the maximum value, or even repeat the blur a few times.
Invert
Still on the second layer, click Image/Adjustments/Invert to invert the colors.
Add some blending
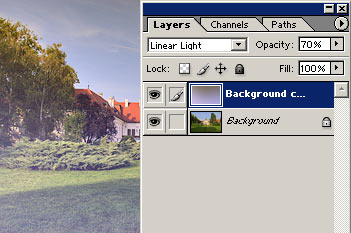
Or, more precisely, blending mode. Choose it from the upper left dropdown on the Layers palette. Set it from Normal to Linear Light.
All you have to do is to refine the rather dramatic effect by decreasing the value on the Opacity slider. We used a value of 70% but even lower values produce a finer effect.
Many years’ work…
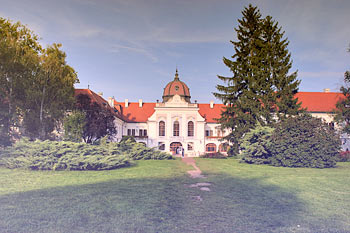
…in just a few minutes. Your photo has just aged half a lifetime.