We haven’t dealt with Patch Tool, a member of the intelligent Clone Tools. The time has come. It helps to copy and paste a selected area or pattern into another part of the photo and as a result we can disguise a fault or fill in empty spaces. The significance of Patch tool lies in its ability to match the surroundings of the copied “patch” with the new area.
Load the photo
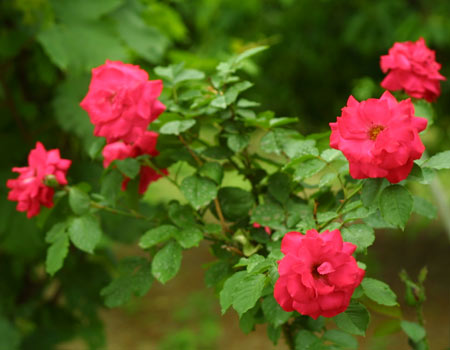
Our topic now is the Photoshop technique we all may know from gardening catalogues. The subtitle could be “How to make an ordinary plant look prolific or abundant in blossoms?”.
Mother Nature was a bit tightfisted to create only leaves in the center of the picture above but the proud gardener cannot put up with it. “Come what may but there will be a flower there” – he thinks to himself and opens his favorite Photoshop Program.
Patchwork
There are several ways to copy a unit into a new part of the picture. We can resort to the good old clone tool. However, it often fails to blend the edges and so we have to play with it a bit.
Patch Tool is a much quicker and a practically automatic solution which matches the copied image with the new environment. If you keep pressing the mouse on the toolbar for a while, you’ll see it appear in the fourth line among the Smart Fix elements.
After selecting it we used the settings in the top options bar indicated with arrows. At the Source setting it is not the area to be copied that should be selected but the area into which you want to copy instead. Destination is just right the opposite: you have to select the area to be copied. We opted for the previous version since the result was more favorable. It is important that the square for Transparent must not be selected because it would make the old area under the copied unit see through in the new arrangement and we wouldn’t like that as we did not aim at a partially transparent flower.
Select “nothing”
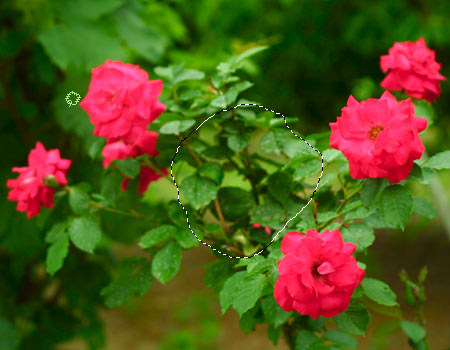
It will be the easiest to copy the bottom-right blossom to the center but since we have chosen the Source option we need to select the central area, not the blossom. Simply drag the Patch tool icon above the photo and encircle the desired are by dragging the mouse around it. You’ll now have an irregular selection marquee.
It is advisable to mark up a somewhat bigger area than just the desired element itself, here, the blossom.
We are double-sighted

Following this you have nothing else to do but to “take hold” of the area and drag it to the place you wish to paste it. In our case this is the bottom-right flower to be grabbed.
If possible try and arrange the edges of the leaves in a way that they more or less match the leaves in the covered area.
As soon as you release the mouse the software pastes the piece into its new place taking into consideration the original lights and the surroundings of the edges. All in all it makes an effort to blend the edges into their surroundings as if they belonged there.
Twins
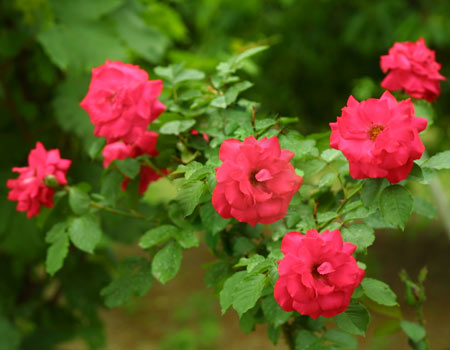
The result fits into the new environment almost perfectly The leaves around the blossom hardly show that they have been cloned from another part of the picture. Only the identical blossoms reveal that we are facing a copy image. Additionally, we can repeat the action with the rest of the flowers and fill the picture with blossoming roses. The resulting abundance of flowers will not conspicuously look alike and our friends may go straight up in the air at the sight of the prolific rose tree.