The simplest way to adjust brightness, contrast, saturation, white balance and sharpness in Corel Paint Shop Pro.
Load the photo

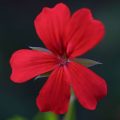
This sample photo is rather underexposed and it could take some sharpening and perhaps a bit of contrast adjustment as well after resizing. All this would take at least three steps if Paint Shop Prodidn’t offer a one-click repair feature.
At hand
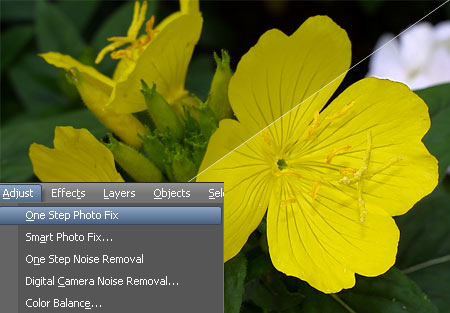
Clicking Adjust/One Step Photo Fix is the simplest way to use this feature.
It has the convenience of letting the application decide the extent of adjustments, setting brightness, saturation, and sharpness very quickly, with one click.
Its drawback is the very same: not letting you any choices. You have to rely on the intelligence of the software, which does not always produce a good result. This is when the next menu item comes handy.
Smart fix
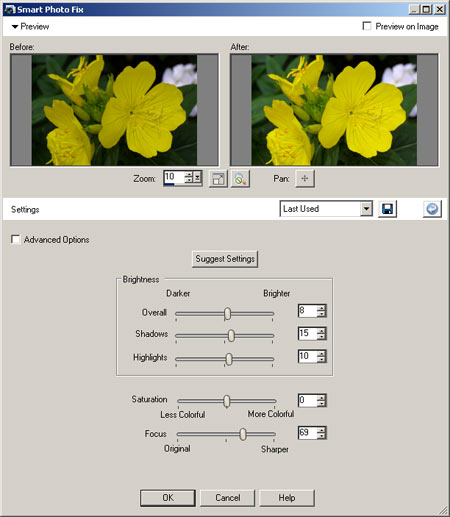
It is called Smart Photo Fix, and besides being automatized, it also lets you influence the result. Clicking it opens a separate dialog which displays the original image and the supposed result on its right. Below, you can see the setting sliders of various options, all in the suggested positions. Click Suggest Settings to activate them.
First, let us look at the Brightness section. It contains three sliders:
Overall: adjusts the brightness of the whole image.
Shadows: darkens or lightens the darker areas of the image.
Highlight: darkens or lightens the lighter areas of the image.
The Saturation slider increases and decreases color intensity.
Focus increases image sharpness. The leftmost slider position means no change to the original. That is, any adjustment to the right sharpens the photo.
The disk button in the top right region saves your settings. You can load them using the menu beside it. The Advanced Options check box is in the top left corner. Select it to display additional settings, discussed in the next step.
Even more smartness

The Advanced Options check box displays a new section on the right side of the dialog. These enable you to adjust two more image properties.
One is white balance or Color Balance. You just have to select its check box and click a point in the original preview on the left which should be white, black or grey but is not so because or a color shift. After clicking, PSP adjusts the colors in the picture accordingly. You can specify multiple reference points, but take care to select only ones that really are exactly those colors, or else you’ll shift color balance even more!
Below, under Blacks and Whites, you can basically adjust contrast. You can check hue distribution on a histogram. The grey graph represents the original distribution, the red one is the adjusted. You may want to set the Black and White sliders so that the black and white arrows are at the beginning and the end of the main peaks interval of the grey graph.
The Black slider increases the hue intensity of darker areas, while White makes light parts even lighter.
In a few moments

With the most basic routine, you’ll get ready with a photo in a few seconds, but even absolute beginners find all the important features required for photo repair on one dialog, so image editing takes much less time.