What shall we do with an unruly photo?
Our first Corel Paint Shop Pro Photo X2 practice article discusses the most basic image editing activities, such as rotating and cropping.
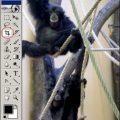
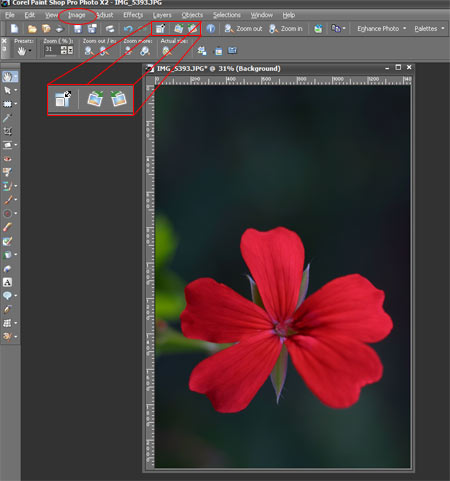
If the photo’s orientation and size is not what you desire, and you want to rotate or resize it, you have an easy job as the appropriate command buttons can be found on the toolbar. The buttons are marked with red and enlarged in the picture below. The first one is Resize, which opens a separate dialog. This is where you can specify the image’s new size. We’ll discuss this dialog later in the article.
If you just want to rotate the picture in 90-degree steps—that is, from portrait to landscape orientation, or vice versa—you’ll want to use the next two buttons. The first one rotates the picture by 90 degrees to the right, and the second does the same to the left. The image below could use a rectangular left turn, so we’ll do just that to it.
The same commands can be found at the top of the Image menu, called Rotate Right, Rotate Left, and Free Rotate.
The first two do what the buttons did, while Free Rotate opens a dialog where you can specify the rotation angle of your choice. Under Direction, click the direction you want, and under Degrees, you can either select one of the predefined settings (90, 180, or 270 degrees), or use the Free field to specify the exact rotation angle in 0.01-degree steps. Select All Layers below to apply the rotation to all image layers (if there are multiple layers in the picture) and leave it unchecked to rotate only the content of the selected layer.
The Image menu also contains further commands that manipulate image orientation. Mirror (Ctrl+M) and Flip (Ctrl+I) belong to those.
The same menu contains the Resize command which opens the same dialog the resizing icon did. Resize can modify image size in two ways. One is Print Size, located at the top of the dialog. You’ll need this only if you use a printer or want to picture to be developed on paper. You can specify Width and Height in inches, centimeters or millimeters. Resolution is for setting output resolution which also affects print size.
However, if you want to watch the photo on your monitor, you need to use the Pixel Dimensions group. Here, you can specify the desired image size in pixels or in percent of the current size. If the value fields are connected by a small lock, you need to enter only one of the two settings, and the other one will be filled by the application in order to keep the original aspect ratio of the picture and thus prevent distortion.
If you do want to change aspect ratio (and distort the image intentionally), select Advanced Options at the bottom of the dialog, and unselect Lock aspect ratio.
This region contains other settings as well. Resample using sets the algorithm used for resizing, from Weighted Average (simple and fast) to Bicubic and Smart Size (the most advanced one). Resizing usually deteriorates image sharpness, but you can use the Sharpness slider to counter this side effect. Set a higher value to have the software sharpen the picture after resizing. If you select Maintain original print size, only resolution and pixel dimensions can be changed, print size will be fixed. The bottom option, Resize all layers, has any effect only if the image contains multiple layers. Select it to have PSP resize all the layers in the same way.
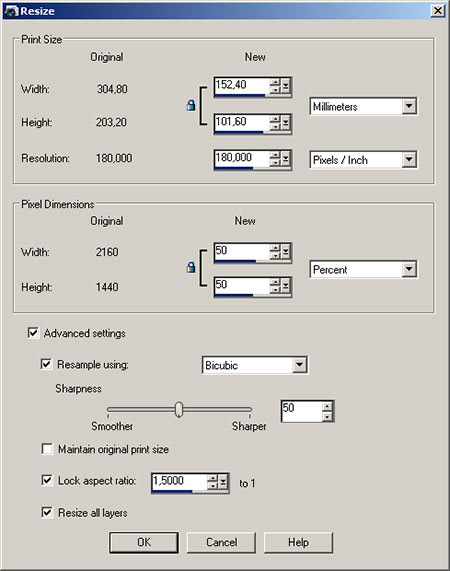
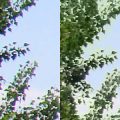
As you can see above, out sample photo has been resized to 50% of the original size using the Pixel Dimensions settings.
For removing unwanted picture edges, you may want to use the Crop tool, the fifth button on the toolbar on the left. All you have to do is to drag a cropping marquee onto the image. The software crops the photo along the borders of this marquee. You don’t have to worry about its precise size and position as they can be adjusted. You can set its size by dragging the desired selection handle. Click the middle of the marquee to drag it into position. In the center, there’s also a shorter line, which is the rotation handle. Click its endpoint and drag the mouse pointer to rotate the cropping marquee as you like.
There are also some buttons visible at the bottom of the marquee:
The first one commits your selections, which means that if you’re done with setting marquee size and position, PSP crops the edges accordingly. If you want to keep the original as well, use the second button instead. This one creates a new window containing the cropped image and preserves the original. The third button removes the marquee from the picture, and the fourth one rotates it by 90 degrees while preserving its size. The dropdown at the end of the row contains predefined sizes which can be useful if you want to crop the picture to some standard print size. In this case, the aspect ratio of the marquee will conform to the preset sizes. The menu contains the most popular photo paper sizes.

Detailed settings for the Crop tool are also available in the option bar above the image. You’ll find the same buttons here, and you can click Preset to choose from the predefined sizes. You can also specify exact marquee size numerically in the Width and Height fields.
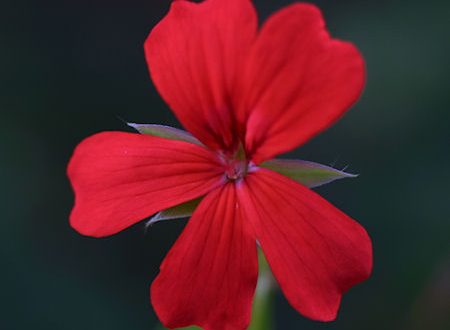
This is our photo, rotated, resized and cropped.
If you like the software, a 30-day trial can be downloaded free of charge from the developer after a quick registration.