It happens from time to time that the camera accessories hang in the photo creating a vignette. There are loads of methods for eliminating it and we are going to mention some of these here. But since we are lucky and the darkening is visible only in the corners of the photo, around the sky, we will apply a very quick method, quicker than any other one, and in our case, also more effective.
Load the photo in Photoshop

The filter or sun shade hanging over the corners of the photo can be quite annoying. It’s a stroke of good luck if the vignette appears in a more-or-less homogenous area because it’s easier to get rid of it completely.
It’s worth trying

There are a couple of methods at your disposal. One of them is selecting a homogenous area (e.g.: the sky), and then placing it over the darks edges on a separate layer. This may work very well if the sky is of one color, but not in other cases because the sample area may be different in darkness or color and therefore the edges of the patches may be visible even if slightly blurred. In the example above this is exactly what we tried, given that the sky seems to be the same color everywhere. But after putting the selected area in the corner, some difference became visible. If you darken the image a bit, the difference is quite discernible (right side).
You can use the recently described Patch Tool but the result might be the same.
It can be a good idea to select the sample right beside the faulty area, or if the area is not homogenous then cloning can be a solution, but all this is time… and money. There’s a faster and better method.
Smudge Tool

There’s a tool that we have hardly mentioned so far. It is often used for painting rather than re-touching, but it comes very handy now. It’s called Smudge Tool. It imitates the effect when you smudge the colors in a freshly painted picture with your finger.
Select the sample area and then select in the top options row a brush with a transition (Hardness: 0%) in the tools palette, roughly of the same size. In this case, the proper value was about 65 pixels. Smudge strength (Strength) should be 100% by all means, and Finger Painting option should be de-selected.
Paint with your finger

Now drag the brush over or above the dark area and with one or more definite strokes smudge the image in the direction of the corners. In fact, you are smudging the vignette with the color of the neighboring areas, and so they will cover the defected parts. As the sky is quite homogenous, none of the above action will be detectable.
If there’s a vignette effect somewhere else too, remove it in the same way.
All clear
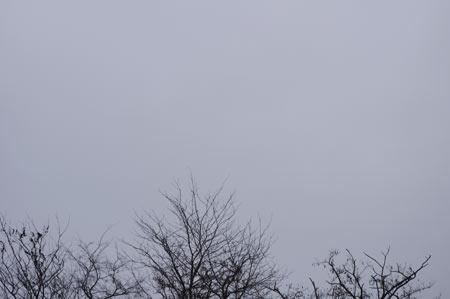
The sky is now perfectly clear – well, not of grey clouds but of the dark edges.
This method can be used to get rid of unfitting objects, such as an intruding branch, electric cable, chimney, etc.