We seem to have left out from our plugin descriptions the ones that aid masking. There’s an abundance of them though. This week’s choice is Digital Film Tool EZ Mask, more closely, its 1.5 version. What can creating a mask do for you? For example, you want to cut out a living being or an object from a picture and place it in front of another background. To show off in front of your friends, for instance. Think of it: you cut out your portrait from a photo where you are lazing in the sun in the garden of your weekend cottage, and then put it on the hot sands of Copacabana. Your neighbors will be green with envy at the sight of the photos taken during your “holiday in Brasil”. 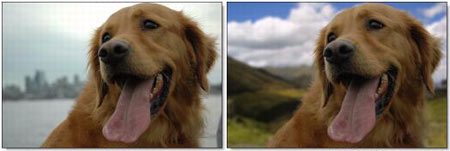 Now seriously, this is just a small slice of masking. The image can be cut out with another tool as well, but masking can be modified afterwards, to your liking. Photoshop, for example, offers a great deal of tools to create a mask, such as the simple quick mask mode, in which you can paint with the different painting tools. With more complex shapes, however, (foliage, human hair, animal hair, etc.), it is quite difficult to paint around the shape you would like to cut out. The basic idea is to paint around the shape quickly, and what is more important, precisely, and then cut it out along the marking. EZ Mask plugin is the tool for this, which is to be found under Filter/Digital Film Tools after installation. But let’s not run forward so much. You will need some preliminary steps before you start to use it. When you load a photo, Photoshop will treat it as a blocked background. If you look at Layers palette, you will see the name ‘Background’ and the lock icon next to it.
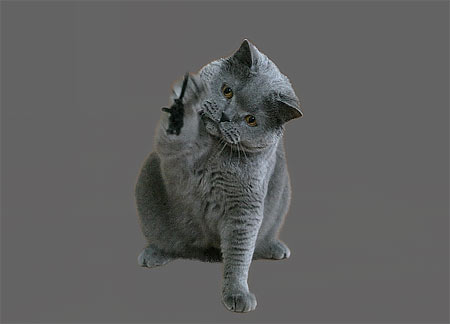
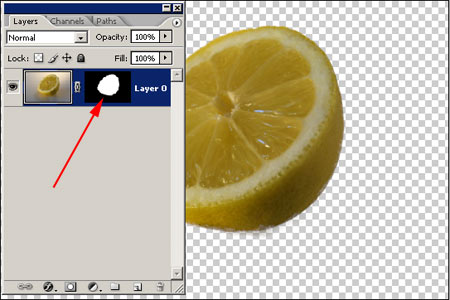
EZ Mask plugin needs an open, individual layer first of all, and besides, a layer mask is also necessary for the more free editing work. To create a separate layer from the background, simply just double click on it. The software will offer a layer name (such as Layer 0), and if you click OK, the background will become an editable layer under the given name. Next, add an empty layer mask to your layer using the Add Layer Mask icon at the bottom of the Layers palette. Nothing changes in the photo, only we will have an empty mask layer now. Using a normal size brush, you can cut out (mask) any area from the picture. The point in EZ Mask plugin is that we don’t have to paint by hand, since the software will automatically do it for us.  There’s one more little preparatory action to do. Now step over to Channels palette, and click RGB Color channel. Following this, you can go back to Layers palette. Open EZ Mask plugin now from the Filter/Digital Film Tools menu. The window coming up looks like this:
  The top of the window shows the major command icons. These are in order: load in mask, save mask, show foreground, show background, show mask, composite view, zoom in, zoom out, adjust to window, pan mode, zoom amount, undo, redo, settings, preview quality, create preview, finish mask editing, help. Let’s have a look at the editing icons seen on right side toolbar with the help of the following example. We would like to cut out the lemon shown in the picture. It’s not a complicated thing to do, so even we, new to EZ Mask will succeed.
 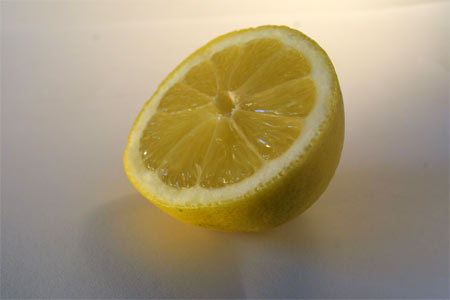 First use Paint Foreground icon, the first one in row (F key). This will help us cut out the desired shape, this time the lemon. In fact, we will receive a brush, with which we have to run around the object from the inside. It’s not necessary to precisely mark the edges, just touch the most important hues and colors. The width of the brush can be regulated by the sixth icon (Brush size). Then click on the second icon and similarly, select the background. Now draw the line outside the lemon. After finishing the two actions, you’ll see something like this.
 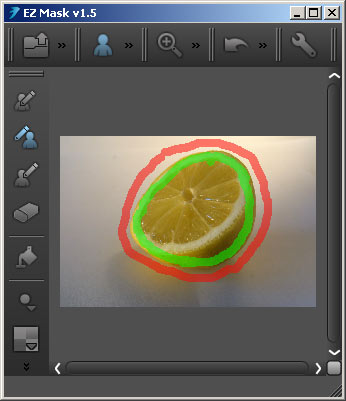 The green outline marks the inner edges of the lemon, and the red one marks the outer edges. The actual edge of the object to be cut out falls between these two lines, and it will be the software that defines it. You can also paint over this area with the use of the third icon (Paint unknown). It is yet an “unknown” territory for the software. In case of such a simple selection, this is unnecessary. If you ruin the outlines, you can delete them with the fourth, eraser icon. The next step is quick selection of image area. The fifth icon is the tool for this (paint bucket). Click on it, then on the first icon (Paint foreground), and one more click is needed in the green selection. With this you will fill in the area within the green outline. The software now know that it is a protected area waiting for selection. The outline of the cut (mask) cannot be within this line. Now click on the second tool and outside the red line. We have selected the background, which will also be left untouched by the plugin. It is surely outside the cut contour, the masked area. Lastly, click on the third icon and somewhere between the green-red outlines. It’s an interesting area for the software. It will have to find the outline of the object within.
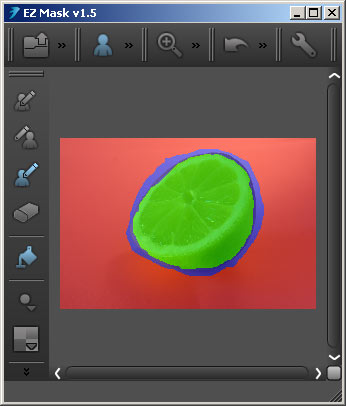
The last but one icon (Overlay Opacity) can increase or decrease opacity of the colored areas. Clear Paint at the bottom of the toolbar will delete all of our selection in case we wish to start over.
Now we can rely on the program, and Done button in the upper icon bar (last but one button) will execute the create mask command. However, make sure to check the mask beforehand, with the two icons in front of it in the row. You can adjust Preview Quality, and you can commence calculating the mask with Process – so far in the EZ Mask window, so you can further edit it in case of an imprecise selection.
And here’s the mask we have created.
The white area is the selection detected by the software, while the black area is what falls outside. In our case it is unnecessary, we want to get rid of it.