Not so long ago we introduced the new HDR feature of Photoshop CS5 which makes the lighting even in pictures with a large contrast difference. It was even mentioned that if you set the value too high you will get an exaggerated, unnatural but very expressive and contrasty picture. This exaggerated HDR effect looks good on faces though. Let’s see an example.
Load the photo In Photoshop
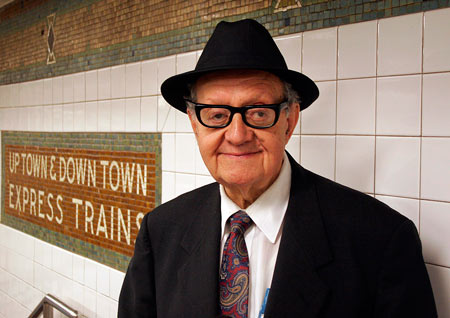
If you would like to apply HDR effect on a portrait, we suggest that you choose an older face as the pronounced contrast practically dramatizes wrinkles. We do not recommend using this tool with the portrait of young ladies since it magnifies each and every little skin imperfection (e.g. freckles).
It is advisable to use a larger photo because this tool highlights the defects of the skin as well as of the photo.
2-3 sliders
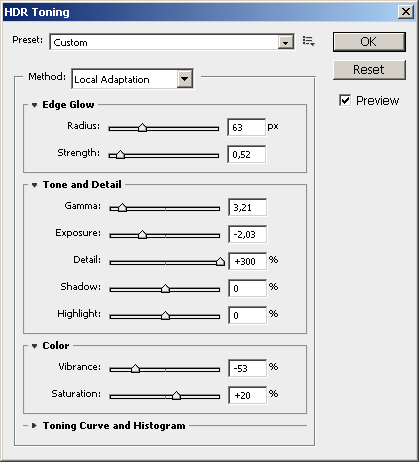
You’ll need the new HDR Toning command under the Image/Adjustments menu.
First of all, make sure that the Local Adaptation mode in the Method menu is active.
In the example here we used 2-3 sliders only. In Edge Glow group we left every value at its original setting, see above.
The first slider is the one called Details. Set it to the maximum (+300%). By increasing microcontrast strongly, you can emphasize the minutest detail of a picture.
Let’s see the next one: it’s the second slider above, called Gamma. Set this low but not to the lowest value. Here the value -3.21 proved to be the best. Start with a similar number, you can always refine it later.
Finally let’s see Exposure, the slider defining lightness.
Set it in a way that the picture has approximately the same lightness as originally, or it can even be lighter than it was. This value depends on the photo. Here -2 seemed to be best.
You can also use the sliders Shadow and Highlight, but they will not have an expressed effect. Still, it’s worth a try.
Application of Vibrance and Saturation is also optional. If you find your photo too colorful, you can dampen the colors with Vibrance. By setting the Saturation value to minimum, you can create a black-and-white photo.
Some noise
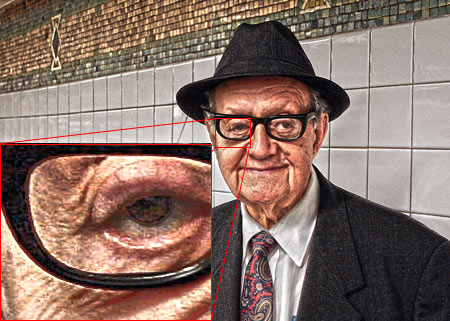
Now let’s click OK in the setup dialog, and you have practically finished.
I said at start that it is a good idea to work with a larger photo since HDR effect emphasizes the defects in the photo itself. This is the case with image noise as well. The picture detail above illustrates what I mean.
If you want to upload the photo in a web based gallery, you can decrease the size of a bigger picture and then such defects will not be conspicuous. The viewer only sees the HDR effect.
Additionally, you can experiment with noise filtering or Filter/Blur/Surface Blur. Although this blurs the image, it concentrates on the less-detailed areas of the picture, and after decreasing the size, the blurring effect will not be very strong.
More expressive
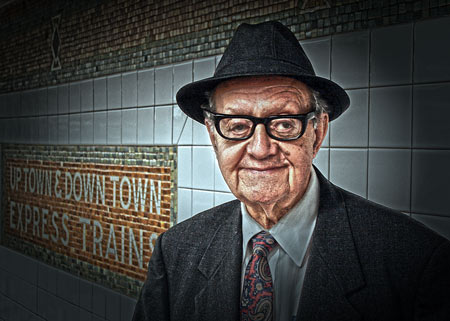
At this stage we just need to do some post-editing and our picture is ready to be published. We applied strong vignetting in the sample above by using a plugin. However, you can achieve similar results with the Vignette sliders of Filter/Lens Correction as well. The photo got a bluish coloring thanks to Image/Adjustments/Photo Filter command.


