If you did not succeed during shooting, let’s give it a try in Photoshop. Setting the Exposure that is. What you’ll read below is a simple tip for increasing brightness, one of the most basic ways to set the luminosity of a photo. The method described is available in Photoshop CS2 or newer versions.
Load in a photo in Photoshop
The major problem with the picture above is probably obvious for all. It is too dark and underexposed … and that’s it. The solution lies simply in a bit of playing with some sliders.
Expo
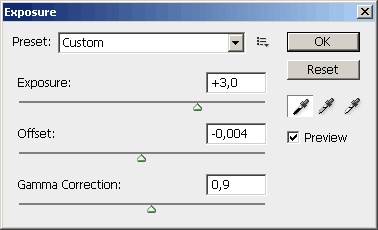
Open the Image/Adjustments/Exposure menu The dialog box will appear as seen above.
The topmost Exposure slider is what we’ve been looking for. With its help you can alter the brightness of a photo after shooting it. Just as if you have used a higher shutter speed. But be careful: if you increase exposure too much the hidden noise might come to the foreground.
As the photo used for illustration was very dark, exposure was pretty much increased: by +3 values.
With the help of the Offset slider you can stretch the tonal range downward. In other words, by setting it low the dark areas can end up totally black, and by setting it high they might fade out. Therefore be modest when using it. You might not even need to alter this value at all. We have set it to -0.004, which made the shadow areas a bit more defined.
Gamma Correction option has quite the same role but is much more tuned compared with Offset. The slider works the other way round: when shifting it to the left the image starts fading, while a shift to the right gives a more defined contrast. We have added some extra contrast to our sample photo.
It is important that the Preview option be checked since you can then monitor the changes in the photo throughout.
Contrast in the automatic mode
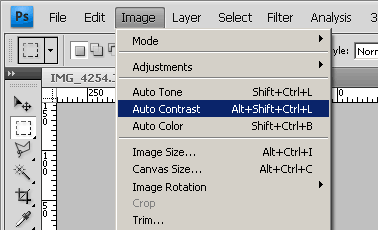
When finished click OK to save settings. It is not a piece of cake to set the contrast right so you’d better use the Image/Auto Contrast command.
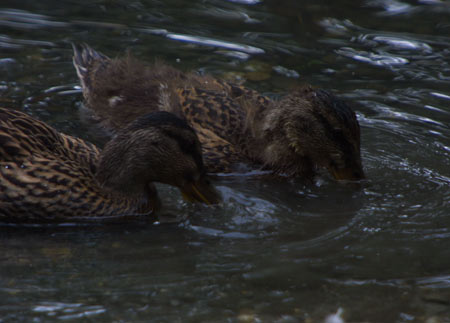
The sun has come out
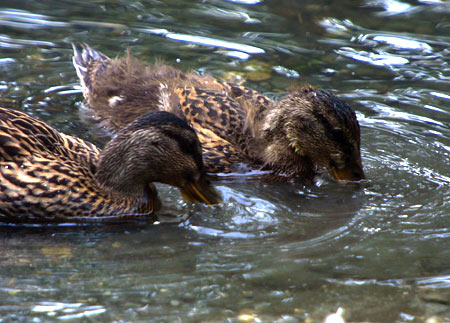
The end-result doesn’t need more commentary than the initial photo, right? At last we get to see what’s really in the picture. In case some disturbing white spots appear in the background or foreground due to burnt-out pixels you can easily make them disappear and restore the original status by using History Brush. A warning here: be careful and meticulous. It is advisable to paint using a low Opacity percentage only.
However, we did not do so. Let’s just stick to the simple Exposure setting. True, there are a few white flecks on the water surface but we can surely live with that.