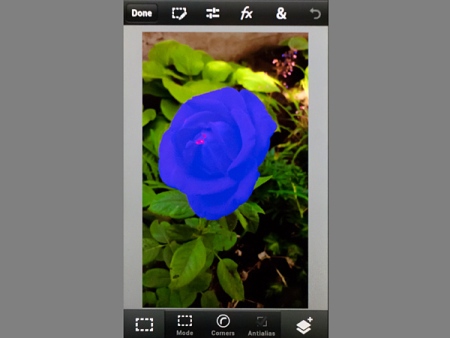
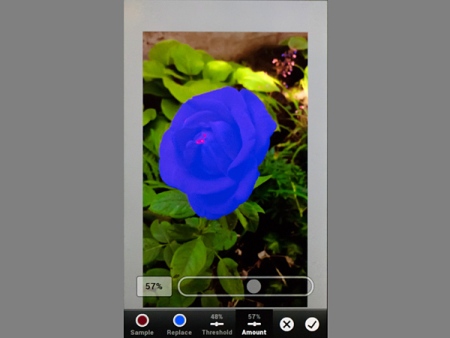
It’s not so much photo adjustments as photo manipulation, as we want to replace one color with another one.
Last time we dealt with the basic tools in Photoshop Touch, an app for mobile devices, more concretely for Android phones. Now we are discussing a similar tool, which is a bit more complicated than just pushing sliders. It’s not so much photo adjustments as photo manipulation, as we want to replace one color with another one.
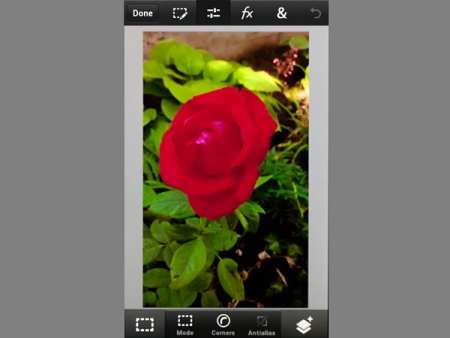
This was the photo we modified the last time, which at that time became more full of contrasts and colors, but this time we should perhaps replace the red petals with blue ones. These steps can be followed in any photo where you want to replace colors (such as the color of the T-shirt in a portrait).
After opening the photo, touch the third icon in the top row here as well, which will display the Adjustment commands in the form of small previews. To carry out color replacement, touch the Replace Color preview.
You’ll have two major tasks in the work interface to begin with: Select the sample color you want to replace and the replacement color to which you want to switch it.
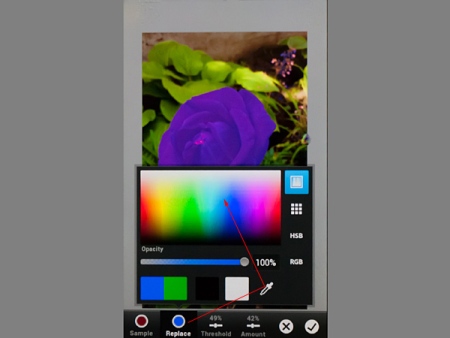
To get the sample color, click on Sample icon at the bottom. A small window comes up with the currently selected color (this is black by default), with a palette and a bunch of icons from which you’ll need eyedropper now. Touch the eyedropper icon and drag it over the area whose color you want to replace. In our case it is the red petal of the flower.
The next step is getting the replacement color, for which click on Replace icon. You’ll get a similar color selection window, where poke at the desired color (for which you want to replace the existing one). This time it’s blue. An Opacity slider will appear below. Opacity of the selected color can be decreased with it.
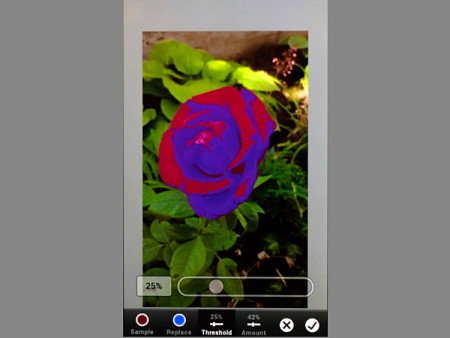
If not the whole desired area has acquired the new color, touch Threshold icon to get the slider necessary for the setting. If you increase its value, a bigger part of the picture will be colored blue, while if you decrease it, only the completely same red as the selected red will be colored blue.
Adjust the slider until the whole of the desired red (or other color) area is gone. It’s at about 40% in our case.
Now comes the blending of the original and the replaced colors as the change might be too strong and the result could be unnatural. Click on the bottom Amount icon to set the percentage of how strong he hue should be. At a lower amount, the blue will be apparent only slightly, which makes the petals purple.
We chose 75%, which might be a bit unnatural but still acceptable.
A better result could be achieved by mixing layers, but that’s another story in the advanced settings section. When you leave the software, Photoshop Touch automatically offers saving the changed photo. Here you can save the new version next to the original by clicking Save.
Next time we will show you how to save it to a folder outside PS Touch, or how you can share it.
