We have tested contrast settings in tablet version of Photoshop.
Beginners, do not get scared if you are reading this „advanced” level contrast enhancement method. It’s only a few steps and the result is definitely better than with the simple method.
We wanted to find out if you can modify contrast in Touch by merging levels, similarly to Photoshop’s PC version. Sure, you can.
First, open an image in Photoshop Touch, possibly one with such poor contrasts as ours.
If you want a quick job, you could choose the simple way. For example, Adjustments palette in the upper icon row, and there Brightness/Contrast command. But you don’t want a quick job. So let’s see a more subtle solution.
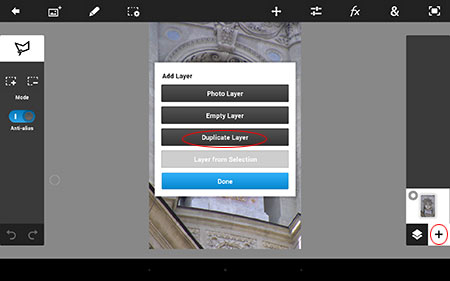
Advanced photo editing tutorials usually begin with ‘Duplicate the layer.” Let’s do so as the first step here as well. Touch the + sign in the bottom right corner of the screen, and then Duplicate Layer button in the appearing window in the center.
By doing so, you will duplicate the only layer of your image, which can now be mixed to result various effects or even increase contrast.
To merge layers, use the icon next to + – sign. Blend Mode of mixing levels and opacity of the upper layer (Opacity) can be set in the appearing window. Just like in the big Photoshop.
Select Overlay in the Blend Mode menu, then set Opacity as you like. The latter will help you decrease the strength of the effect. If you think the contrast increase is too weak, duplicate the upper layer again. Set the blend mode of the new layer to Overlay too and you’ll get an even more prominent contrast. From here onwards, soften the result by decreasing the value of Opacity.
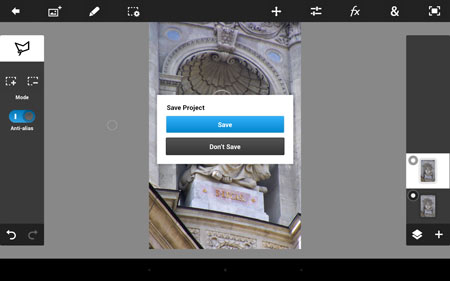
If you like the new settings, click on the back arrow in the upper left corner and save the image.
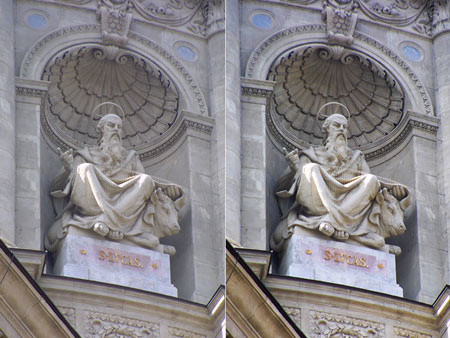
Put the original and the finished pic next to each other to see the effect of “Overlay” contrast increase well. We have merged the two layers with 66% (Opacity).


