This time we’re going to transform a gloomy picture into a sunny one with the Photoshop version made for mobile phones.

Would you like to turn your photo that’s been taken on a rainy and cloudy day into a little (or a lot) more sunny? No probs. It’s all just a few clicks in the mobile version of Photoshop.
First, open the desired photo in PS Touch.
If the photo is pleasantly bright, it’s a good idea to darken it a bit, but if it’s dark, it’s going to be an ideal subject for this effect, especially because the sunny afternoon effect increases brightness too.
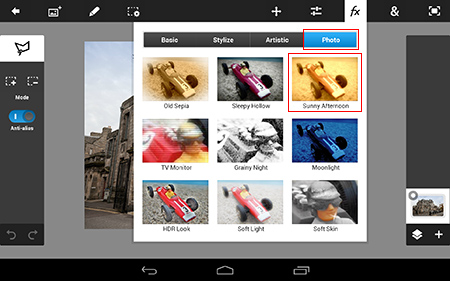
The most difficult step is to find the effect, but of course, it’s not that hard after all. Touch FX (effects) icon in the upper icons row, then touch ‘Photo’ tab in the appearing menu. You’ll have to select the third option in the first row, Sunny Afternoon.
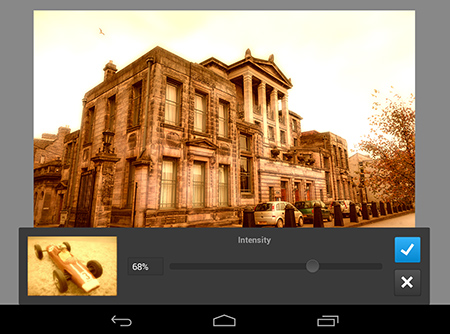
You’ll be rewarded with another window with a single slider called Intensity. This will regulate the strength of the sunny affect. You can go from a mild effect up to burnt out by shifting the slider to the right.
Here we used quite a strong effect, 68%. Settings will be finalized by hitting the blue “tick” icon.
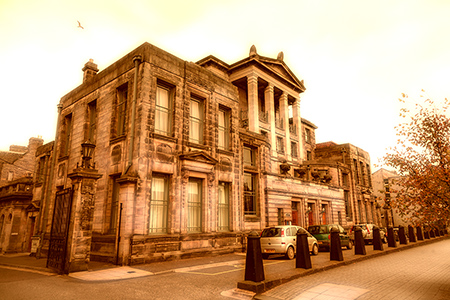
And here’s the result, showing how brightness has grown and the sky has burnt out a little. This can be avoided by darkening your image a bit before using Sunny Afternoon.