You can discover in Photoshop many a small feature, which might seem quite irrelevant at first but they can significantly help and speed up your work in fact. One such feature is the color interval selection tool located at color saturation setting, which may be familiar for users of Adobe Lightroom.
Load the photo in Photoshop
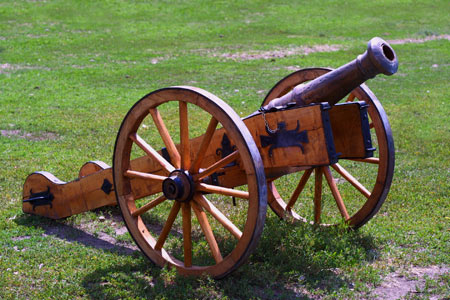
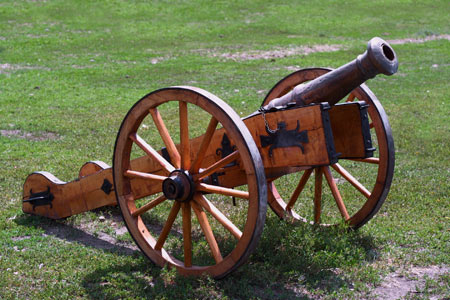
In this photo here two color areas that need to be put in order. The grass is a bit neon-green colored. It’s not horrible but it could be more natural. In addition, the bluish-purple discoloration appearing on the soil and the cannon. However, we would like to keep the rest of the colors as they are.
The new boy
A new tool in the CS4 version of Photoshop is selection marker from Lightroom, such as in the bottom left dialog of Image/Adjustments/Hue/Saturation menu. It works similarly to the previous solution, the color scale below, but it is quicker and more simple to work with the color respectively.
In 10 seconds
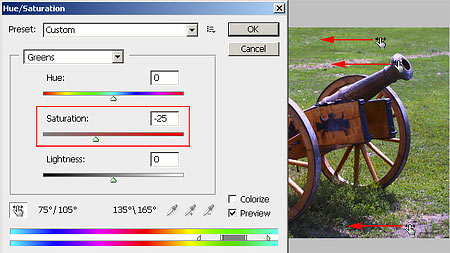
Click on the icon, then drag it over the photo. At first it appears in the form of a color selection pipette, but when you click on any point of the picture with it, it selects the color of that certain point and the pipette changes into a hand similar to the button. Keep the left mouse button pressed and drag it to the left or to the right in order to decrease or increase saturation of the selected area.
First drag it over the green grass, click, then keep the mouse button pressed. You have selected the vivid green colors this way. The color scale at the bottom of the panel now shows the selected color interval. Keep the button pressed and drag the mouse carefully to the left to see how saturation decreases. The value of Saturation slider also starts to decrease.
Next, you have to do quite the same: click on the next color – e.g. the strong blue of the metal surfaces- and decrease their saturation likewise. If necessary, you can set another color area likewise, you don’t need to open a new window or select another area for doing so, just click on one- two points of the picture.
Low-key colors
Here is the resulting photo, which took us 10-15 seconds to achieve: the annoying exaggerated colors are gone. With the help of this method you can completely banish certain color intervals from your photo, for example, you can turn the grassy area into black-and white, while the rest of the photo remains untouched.