A new resizing algorithm was introduced in CS versions of Photoshop, so for quite a lot of years ago. There’s a separate setting mode for zoom in and zoom out as well. It’s worth taking a closer look at them. How to resizing photos in Photoshop CS+.
Load the photo in Photoshop

This time the photo itself does not matter. Load any photo you wish to zoom in or out.
An expanded list

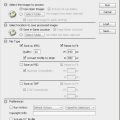
The easiest way is to select Image/Image Size menu.
We have been here before. We also learnt how the interpretation algorythms in the list at the bottom of the panel influence the appearance of a resized photo. It’s important to first select the parts you wish to blur, and it also helps to make their edges a bit transitional.
Open the list in Photoshop CS or newer versions and a wider range of options will be available than earlier. Beside Nearest Neighbor, Bilinear and Bicubic setting options there’re also Bicubic Smoother and Bicubic Sharper options available. Their basic role is indicated in brackets too.
Bicubic Smoother is a bicubic method with a smoothing effect, which is therefore useful for zooming in pictures.
Bicubic Sharper on the other hand makes the image a bit sharper and therefore is useful for zooming out.
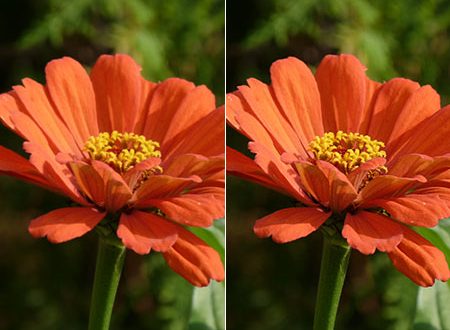
Zoomed out…
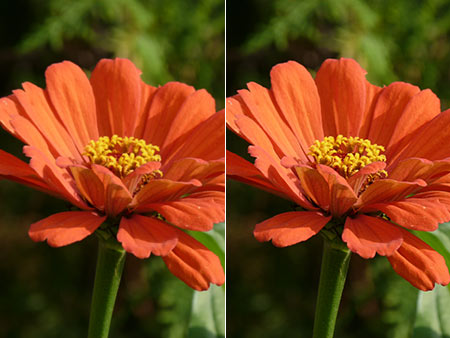
Let’s see two examples.
The original image of 12 megapixels in size (4320×3240 pixels) was first diminished to 450 pixel-width with the best Bicubic algorythm. The result is shown on the left side. The image has become a bit soft.
Next, the same image was diminished with Bicubic Sharper option. This is shown in the right, and when taking a closer look at it, you might notice that it is a bit sharper, the details are more clear. The photo does not need any more sharpening in the end.
… and zoomed in
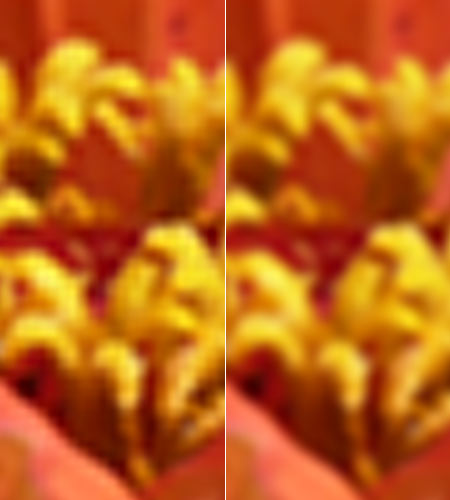
Now we magnified to photo to a 10 times bigger 4500 pixel-width.
The left-side picture shows the result of zooming in with Bicubic Sharper. We saw it is ideal for zooming out, but it does not seem to be fit for zooming in because the image is now fragmented, checkered.
The right-side detail is from a zooming out with Bicubic Smoother option. For this action this is the perfect alogrythm. Transitions and edges are smooth, the checkered surface can be avoided thus.