Even group resizing is possible with the somewhat hidden Image Processor.
Step 1: Load the photo
 Any opened photo or photos can be resized and saved in various formats even using Image Processor tool. This function was introduced in Photoshop CS2 version.
Step 2: Mr. Processor
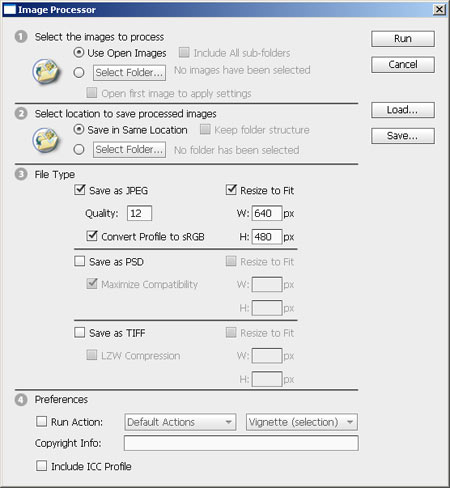
Image Processor is located under File/Scripts menu, Open it and the window shown above appears.
In order to be able to resize your photos opened in the software, check the Use Open Images option in the first point.
Under the second point you can select the location where the ready photos should be saved. In our case this is the original folder of the images (Save in Same Location).
You can choose the format the images should be saved in under the third point. It can be various (JPEG, PSD, TIFF). Select Resize to Fit for resizing. It is mandatory to state the width (W) and height (H) value sin pixels, while the software will always adjust to the smaller value keeping the original side proportions. In other words, you may indicate a 10 000 x 480 pixels value, yet the resized picture will have a shorter side of 480 pixels and the other side will change proportionally to the original side ratio.
Step 3: More at a time
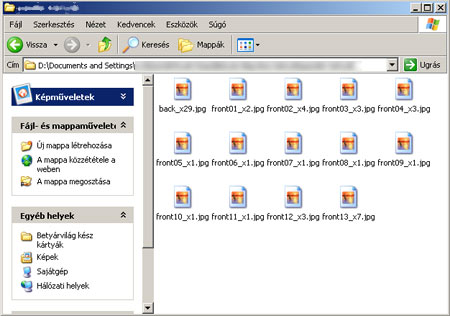 You can resize not only the opened images but all the photos in a folder using Image Processor. In this case you’ll need to choose Select Folder and indicate the saving location under the first point of Image Processor settings. The further settings are as written above. Step 4: In a separate library
 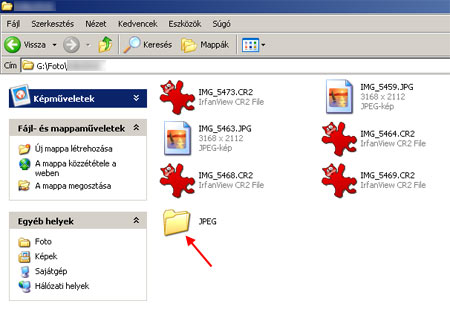 Following the resizing, the new picture(s) will be in the selected location but under a separate folder. The name of the folder rendered by the software will be based on the file format and each file with a different format will be saved in a different (JPEG, PSD, TIFF) folder. The example above shows the saving location of the JPEG pictures.

