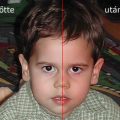
We have already discussed how to eliminate smaller errors in facial skin. Now let’s turn the thing upside down! We’ll emphasize them. Using the blue color channel, you can make skin color much more powerful, or tanned-looking, if you please. This method works especially well if you transform the photo into black-and-white afterwards. Although the subject will age about a decade, but the characteristics of their face will be more emphatic, and the wrinkles deeper. “A face can tell stories” a poet wrote. Well, the storytelling evening is about to begin!
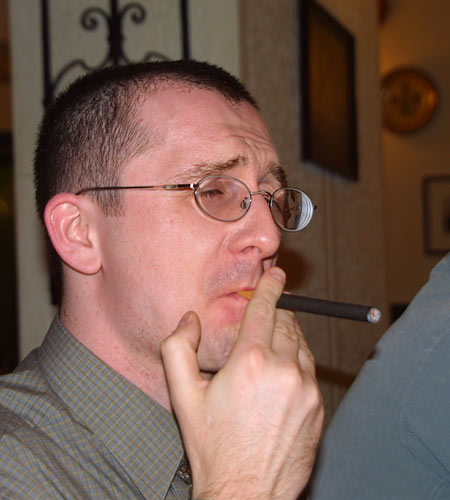
Load the photo in Photoshop
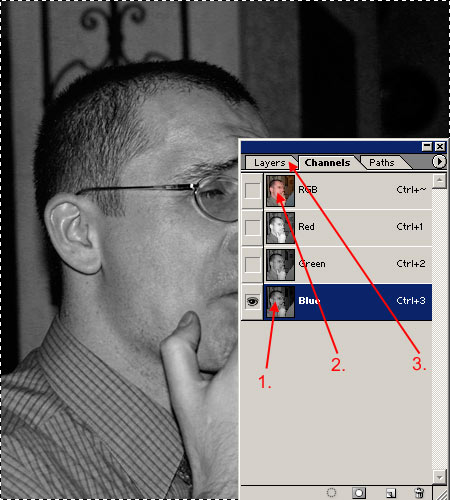
Your aim is to tan the skin. To do this, first click the Channels palette.
One by one
You have three easy steps to take on the Channels palette. You can use key combinations to quicken you work.
First, select the Blue channel—press Ctrl+3, or click the channel name. Now copy its contents to the clipboard. Press Ctrl+A to select all, and Ctrl+C to copy. Now click the RGB line containing all the channels, and return to the Layers palette.
Mixing ‘em up
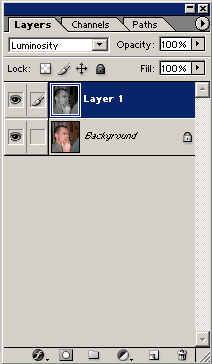
After copying the blue channel, it’s time to paste it somewhere. Press Ctrl+V on the Layers palette, and voilá, the contents of the blue channel are now pasted to a new layer.
Now mix the new layer with the original one by using an appropriate blending mode. Select Luminosity instead of Normal in the blending mode dropdown, and you have your colors back, albeit a bit differently. The face became darker, but together with it, all the other colors changed, too. Blues got weaker, greens got angrier, and yellows turned to black.
What you don’t need
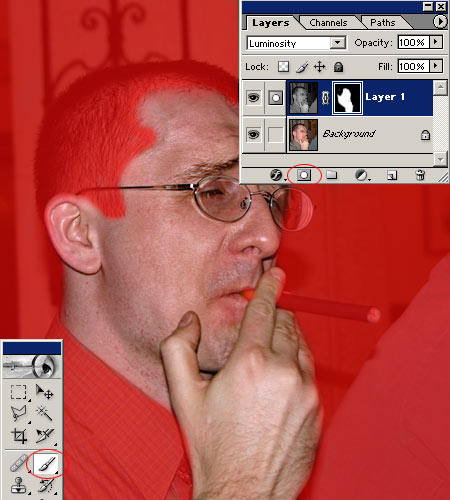
…is to change all the colors. You only want to darken human skin. Let’s restore the other areas to their original state. This can be done the most simply with a layer mask.
Select the Brush tool, and choose a soft, large brush from the options. At the bottom of the Layers palette, click the Add Layer Mask icon to get a white mask in the second layer. Now you can paint onto this layer. Paint over the areas we colored red in the picture above. That is, everything but the skin. The red color is only an illustration, you won’t see it when carrying out the procedure. You can instead look at the layer mask indicator which displays the painted areas in black. Or, for that matter, you can see that those areas revert to their original colors in the photo as you work them.
Make it stronger!
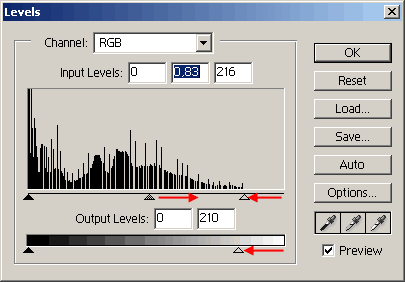
Use this step only if you don’t find the darkening of the face powerful enough after the above procedure.
You can augment it by clicking Image/Adjustments/Levels. On the dialog, drag the grey triangle representing midtones to the right, and the triangle on the right to the left. The latter restores a bit of the lighter areas and therefore, contrast. You can also drag the right triangle in Output Levels to the left for additional darkening.
The above values, naturally, are only appropriate in this example. You have to find the proper values for your photos. Fiddle around with the three controls and look for the ratio your picture needs.
Copper skin

It’s easy to spot the difference. Pay attention that this procedure won’t necessarily please the subject as it ages the face rather much, deepens even smaller wrinkles, brings forth lesser defects and strengthens freckles. However, it helps the face become more characteristic. It enhances mimics and the displayed feelings for the viewer.