On we go, fighting noise. In an earlier Photoshop tip, we have explained how to remove color noise. Today’s foe is a tougher one: luminance noise. It is a great pity that Photosho’s current versions still don’t contain a dedicated automatic or easy-to-use noise filtering feature, and thus we ourselves have to deal with noise in several steps if we find it annoying.
We have two aims when filtering luminance noise. One is to reduce visible noise as effectively as possible, the other is not to remove or blur tiny, delicate details.
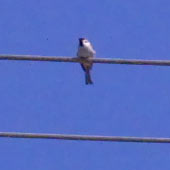
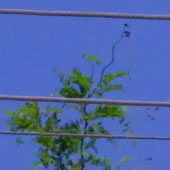
We have chosen two characteristic parts of the original photo that will remarkably show the effects of changes we make, including noise removal and changing details.

First, click Image/Mode/Lab Color to switch to Lab color mode, and duplicate the existing Background layer by dragging it upon the indicated icon at the bottom of the Layers palette. This way, the original image remains on the background layer, while you can freely modify the new layer. Select it now.

Change to the Channels palette (next to Layers), and click the Lightness channel. This is the only channel you have to use for removing luminance noise. The channels ‘a‘ and ‘b‘ underneath affect colors. They are to be changed when filtering color noise, as described in an earlier tip. The catch is that Lightness stores all the information on the details and sharpness of the picture, so any blur or drastic change will impair the elaborateness of the photo. This is almost unavoidable when using even the best noise filtering procedures, but we want to reduce it as much as possible.
Drag the Lightness channel upon the duplication icon at the bottom of the palette, just like you did with the layer before. Now you get another alpha channel (called Lightness copy) that you can change as you like without affecting the picture. You have to make a selection on it to divide the edges you want to keep from the smooth areas that contain more visible noise. This is because we want to keep the edges and details, while we want to remove the noise, especially from the smooth areas.
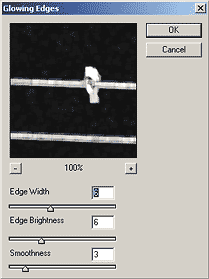
Select the alpha channel and apply the Filter/Stylize/Glowing Edges effect. This effect looks up the edges in the picture, and highlights them in white, while leaving the smooth surfaces black. You can set the following options for the effect in the appearing dialog: Edge Width controls the width of the white selection. This depends on noise level and the detailedness of the picture. The finer the details, the lower value you should use. As our photo contains fairly delicate details, we’ve used a value of 6 as a golden mean. Edge Brightness sets the brightness of the selection. We have set it to 6, too. Above a certain value even noise on the smooth areas will become white. Use a lower value that doesn’t highlight any noise. Smoothness is for blurring the light areas. This serves a similar aim: to keep noise from lighting but make the important areas of the picture bright enough. We have used a value of 3. Now you have a dark alpha channel with white edges. You can still refine it by dulling the rough white edges a bit. Click Filter/Other/Minimum and set Radius to 1. Click Filter/Blur/Gaussian Blur to blur the image. Use a very low value, about 1.5–2, to blur it only slightly. Overblurring is not recommended.
When you’re done, you have a black-and-white alpha channel that shows the details and edges in white and the smooth areas as black patches. This alpha channel serves as the source for making a selection. We have to select the smooth areas for noise reduction while keeping the details intact. As Photoshop will primarily select white areas and you have the smooth areas in black, click Image/Adjustments/Invert to invert the channel. Now hold Ctrl and click the name of the alpha channel. White areas are selected and dark ones remain unchanged.
All you have to do is click Lightness and press Ctrl+H to make the selection marquee invisible. The selection is still valid but the marquee won’t disturb you in your work.
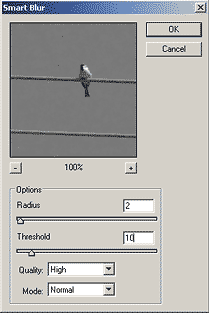
Now click Filter/Blur/Smart Blur, one of the most effective tools in noise removal. Set Quality to High, and be careful when setting Radius, as a value too high will lead to a nasty blurring! 1–2 should be enough, except when the noise is very grainy. Threshold controls the extent of the blur. You shouldn’t set a value higher than 10–15. We have used a value of 10. You can observe the changes on the preview above. Watch noise reduction and also keep in mind not to damage the details of your photo.
To continue the changes, click somewhere in the picture to cancel the selection. Change to the Layers palette, and set the proper Opacity for the upper layer to refine the results. The lower original and the upper, noise-filtered layers are mixed in the percentage you set. An Opacity of 0% only shows the lower, unchanged layer, and as you increase it towards 100%, the effect of the upper, filtered layer gets stronger. If the filtering removed lots of details, you can use this technique well to refine the proportions of the original and the modified layer.
All that’s left to do is to click Layer/Flatten Image to merge the layers, and Image/Mode/RGB Color to switch back to RGB color mode.
If you find the above procedure too complex, you can save the steps as an action. However, using a program or plugin specifically made for noise filtering will bring better results. Recommended programs: NeatImage, Noise Ninja, Noiseware.