Well, here we go again. Increasing contrast in Photoshop is easy as pie. There’s even a command with such a name. However, from the previous articles you may have learned that there are numerous alternatives, which may, in certain cases, be much better. Increasing contrast with the traditional method narrows the hue distribution of the picture. Dark areas may become pitch black, and very light ones get bleached to total whiteness. If this is what you wanted, it’s all right. But what if you want to preserve these areas? This is the topic of the article below.
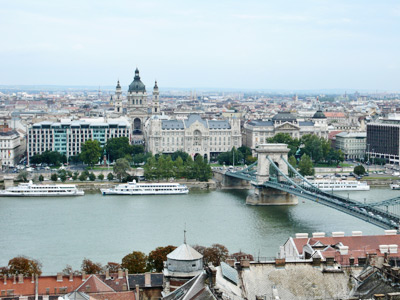
Load the photo in Photoshop
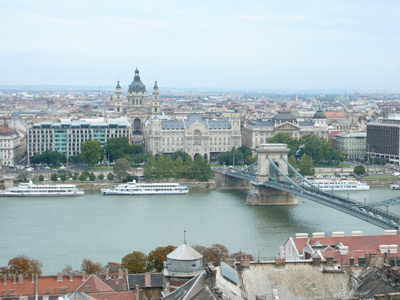
The photo’s a bit “misty”, it could do well with a bit of contrast increase, but we want to preserve the light areas in a near-original state. Although Photoshop‘s traditional contrast increasing feature is very quick, it will produce a white, bleached sky in such a case.
Let’s find a more difficult, albeit profitable way!
Greyness
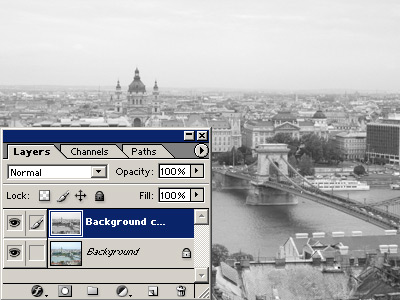
Duplicate the original layer by clicking Layer/Duplicate Layer, and click Image/Adjustments/Desaturate to transfer the new layer to grayscale mode.
High pass
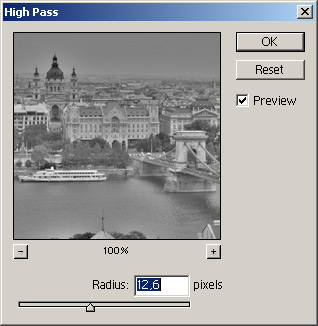
Click Filter/Other/High Pass to equalize the lightness levels of the black-and-white image. Your aim is to get a homogeneous mid-grey in the light areas (e.g. the sky). The mid-grey areas will retain their original lightness. Use a mid-ranged or high value. For our small picture, 12 was enough, but for high-resolution images, 50 to 80 should be just fine. Make the picture look something like the one above, with large grey areas. Too low values sharpen the picture roughly, which is not something you might want to do now.
Catching the effect

Pick an appropriate blending mode on the Layers palette. For us, Overlay (or, for softer conditions, Soft Light) gave the best results.
The contrast increase is basically ready, the rest is just fine-tuning.
The magic mix
Still we have a bit of a problem. The High Pass filter made large dark areas a little too light, which makes the photo flat. The effect is not too eye-catching, but it could look better. So, why not enhance it?
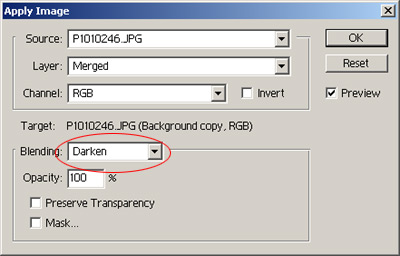
Click Image/Apply Image, and specify the values visible in the above illustration. The Darken blending mode is the most important.
Shadow contrast…
…increased significantly in the picture. Light areas didn’t get bleached, and still the picture became more lively.
In the end, we decided to change the blending mode from Overlay to Soft Light to produce a little softer effect. If you want a stronger contrast, leave it on Overlay.
After merging the layers (Layer/Flatten Image) save the photo.