Way back, before the Shadow/Highlight feature appeared in Photoshop CS, increasing the dynamic range of a picture was a rather complex task. Complex indeed, but not impossible. As with some other procedures, you have a zillion ways to do it, one of which we already explained earlier. Now we’ll take a look at one of the simplest and most obvious methods, with some layer juggling. The main advantage of the procedure is that it is also suitable for the elderly… err, pre-CS Photoshop versions.
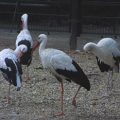
Load the photo in Photoshop

This photo is not particularly interesting, as the contrast difference caused by the largely different light levels couldn’t be handled by the digital camera. The upper part (the sky) is appropriately light, but the lower half is rather dark. Quite many of the details are obscured.
Double again
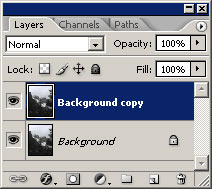
Our regular readers will chant the first step in unison. Yes, it is duplicating the existing picture layer. Click Layer/Duplicate Layer to do so. You’ll be working on the upper layer and leave the lower one untouched.
Grab the one on top
Now, for the upper layer. First of all, discard colors. You’ll only need lightness information, but no colors. Click Image/Adjustments/Desaturate.
Next, click Layer/Adjustments/Invert to invert the layer.
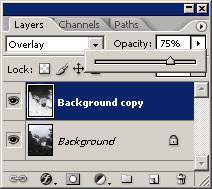
Now, return to the Layers palette and set the blending mode from Normal to Overlay. You can see the result immediately: dark areas became lighter, while hitherto light ones darker. If the effect is too strong, decrease Opacity to weaken the upper layer.
A bit of a blur
By slightly blurring the upper layer, you can produce a less harsh result, as the procedure boosts detail contrast (i.e., sharpness).
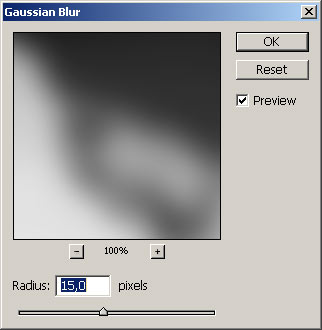
We used the good old Filter/Blur/Gaussian Blur filter (in this case, with a value of 15 pixels, quite high for the 450-pixel width). You should choose a high value as a radius of less pixels often produce a definite and unnatural-looking halo along the edges. Higher values produce a wider halo which, therefore, blends better into the picture than a thin, shining border.
A final touch
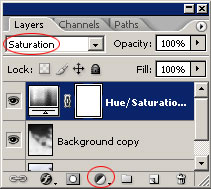
As an alternative, you can slightly increase saturation, as you can often barely find any colors in the areas where shadows have been lightened.
For this purpose, we used one of the adjustment layers at the bottom of the Layers palette, called Hue/Saturation. After setting Saturation to a proper value, we set the blending mode of the new layer to Saturation.
If the photo has an acceptable saturation after the dynamics increase, you can even skip this step.
More pleasing to the eye

There you are, a picture that looks much more realistic. The difference is quite significant.
Finally, merge the layers (click Layer/Flatten Image) as this is required before saving to JPEG format.