Always those corners! It’s time we used some curved shapes as well. So, today’s Photoshop tip will show how to crop your photos to nice ovals using the Elliptical Marquee tool. It will be absolutely simple, so don’t be afraid to read on. It is strictly for beginners!
Load the photo in Photoshop

Here’s a photo that we want to crop, but not in the usual rectangular way.
Where is it hiding?

All you have to do is to find the Elliptical Marquee Tool. Bring the cursor over the first button of the toolbar on the left. By factory default, the button is the Rectangular Marquee Tool. Click and hold the left mouse button to display a dropdown with more choices. From the second row, select the elliptical marquee. This tool lets you make selections of a round or oval shape in the picture.
Oval

Bring the cursor to one corner of the area to be selected, click and hold the left mouse button, and drag towards the opposite corner. Release the button to finish the selection.
Click and hold the button inside the selection to drag it about the picture, and read on to learn how to resize or reshape it.
Shaping
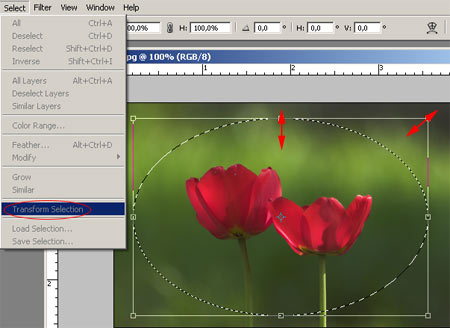
To resize or reshape the selection marquee, click Select/Transform Selection in the menu. The eight handles that are now displayed enable you to transform the selection as you wish. To resize it while keeping the current aspect ratio, drag a corner handle while keeping the Shift key pressed. If you got the shape and size you want, press Enter to finalize.
As you like

The selection is done, now you have to decide if you want to do something with the area inside or outside it.
For example, to copy the inner area into another picture, press Ctrl+C, open the other image, and press Ctrl+V to paste.
However, if you want to remove the areas outside the selection, to give a border of sorts to the image, you have to invert the selection. Right-click inside the marquee, and in the context menu, click Select Inverse. This way, the outer area becomes selected. Now you can simply press Delete to remove the outer parts. This gives you the oval border visible above.
Of course, you cannot save the image as an oval shape as the operating systems do not handle “round” windows and image files.