This Photoshop article can be viewed as a sequel to the previous one, since we raised the question there: how to sharpen an area of a picture without affecting other parts. It is very simple, you just need to rely on your masking skills. The rest is child’s play.
Load the photo

If you read our previous Photoshop article, you may find the image familiar. In that article, we set the building straight using perspective correction. But since we had to stretch the top of the picture to achieve our goal, a new problem arose. The top of the picture lost sharpness.
Therefore we need to sharpen it without affecting the rest of the image.
Another layer

We need to use a mask to cover a part of the picture. The simplest way to do that is to create a new layer (click Layer/Duplicate Layer), and click the indicated button on this new layer to create a blank vector mask. We’ll use this vector mask to specify which areas should remain visible from the layer below, so that we can sharpen it.
Make sure the vector layer remains selected, just like in the picture above!
Putting the mask on
We only want to sharpen the top of the photo, so that is the area we have to leave unmasked. However, we don’t want a visible difference across the picture, but rather a nice gradient transition spanning the whole image, that is, the soft blending of the new layer into the original one. Since the image content is the same in the two layers, the transition won’t be visible, but any adjustment we make to the top layer will blend into the lower one gradually. Well, perhaps showing it is easier than explaining.
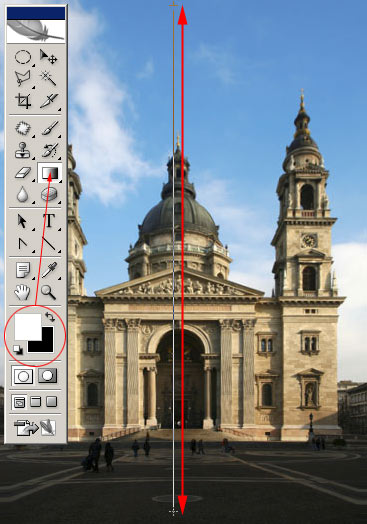
On the tools palette, make sure black and white are selected as foreground and background colors. Then select the Gradient Tool. Drag a straight line from the top of the picture to the bottom.
Unnecessary edges
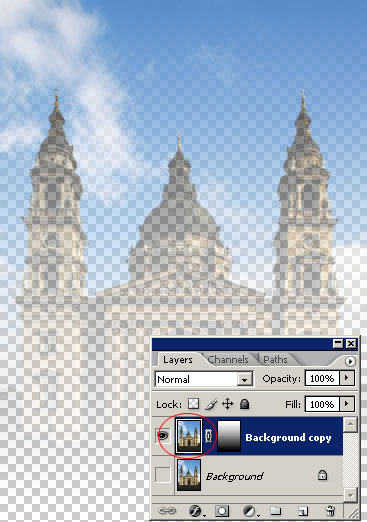
Since we’re working on the vector layer, the picture does not show the white-to-black gradient, but the vector mask does. We’ll get a mask which makes Layer 2 gradually transparent downwards. You can check this by switching off the lower layer for a while. The above example shows the upper layer only, and its bottom is gradually disappearing, since it is masked out by a gradient vector mask.
Now switch the bottom layer on again and click the small image on the upper one.
Good old…
You can now go on with the well-known sharpening procedure, this time on the upper layer—or more exactly, its top half, which is visible. This way, the sharpening will only affect the top, and the rest of the image will be provided by the bottom layer.
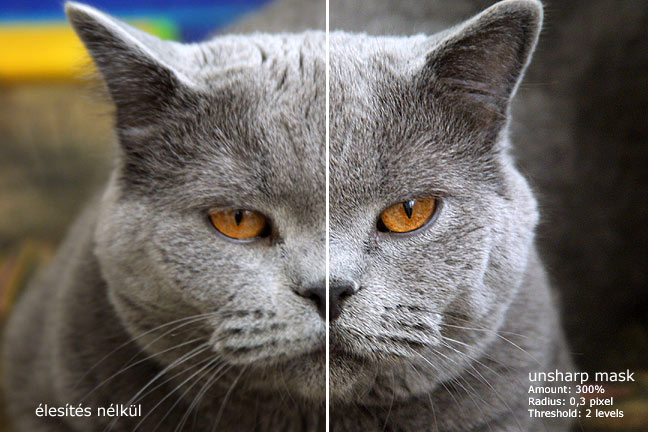
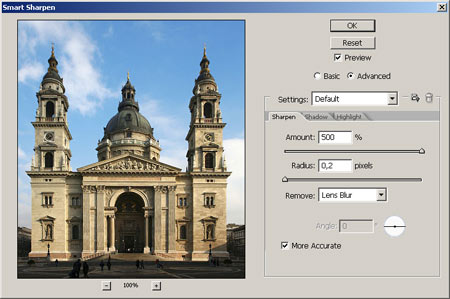
You can use any sharpening technique you like, such as Filter/Sharpen/Unsharp Mask or Filter/Sharpen/Smart Sharpen. We used the latter with the settings you can see above. You can safely use intense sharpening since you’re working on a separate layer. If it is too strong, you can decrease it later using the Opacity slider on the Layers palette.
The upper half is sharper

The top half shows more distinct signs of sharpening than the bottom one.