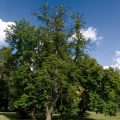
Our next tutorial is for users of Photoshop CS3 or higher versions and aims at imitating the unique visual effects of infrared filters. We know by now that when it comes to filters, it’s always better to use a real one, but if the colors are suitable, you can try mocking them in Photoshop. Such as the blue sky, green foliage pair, which often calls for the infrared filter.
Load the photo
Try this effect preferably with a landscape photo taken in the spring or summer, since the filter is going to influence the green of the plants and the blue sky too. The effect shows most in these two colors. Don’t worry if there are clouds in the sky – all the better. The off-white splashes will look good against the dramatic black sky, counterbalancing the darkness.
It’s a good idea to work with an original-size photo rather than one zoomed out for a web gallery, and diminish size only after applying the infrared effect. We will now meddle with color channels to quite an extent, which may cause fragmentation and add noise. This would be less disturbing in a small size photo, however.
That’s all!
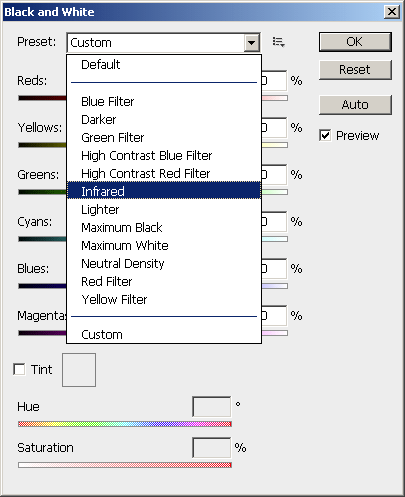
In recent Photoshop versions you hardly have to lift a finger. Simply find Image/Adjustments/Black and White menu, then select in Presets the Infrared option… and that’s it.
Note that you can find a similar Preset in the same menu among the factory settings of Channel Mixer, but the one above provides a better result.
Some post-editing
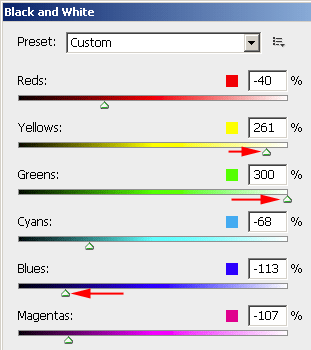
You can stop right at this point if you like the result, but you can still polish the photo. If you wish for an even darker sky, shift the Blues slider to the left, and if you would like to see brighter foliage, shift Yellows and Greens sliders to the right.
Slightly blue
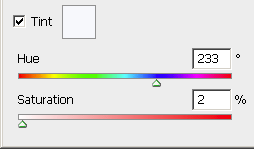
A very light blue impression will do good to the picture, which fills it with more contrast.
Select a very pale blue in Tint panel, so pale that it’s almost white. Then you can balance saturation (Saturation slider). It’s enough to set Saturation to 2-3 %, and our photo receives a bluish tint to it.
Beyond red
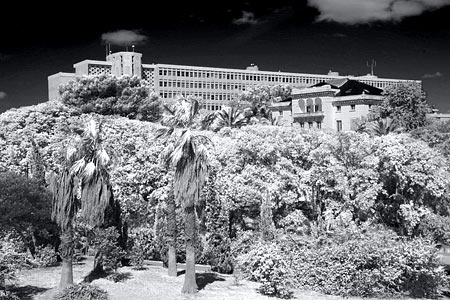
The photo really looks like one with an infrared filter. Now is the time for reducing size if it’s needed.
If you use older than Photoshop CS3, you’ll find a tip for the same effect at the link below.