It is not the first time that we have tried to mimic a photographic filter with a software tool, and this is not the first time we have resorted to the popular polar filter. It is of course nearly impossible to emulate all the effects of a real filter with this tool, but we can create quite a convincing illusion in a landscape picture for instance. After all, it is not so complicated to increase color contrast or intensify the blue of the sky.
Load the photo
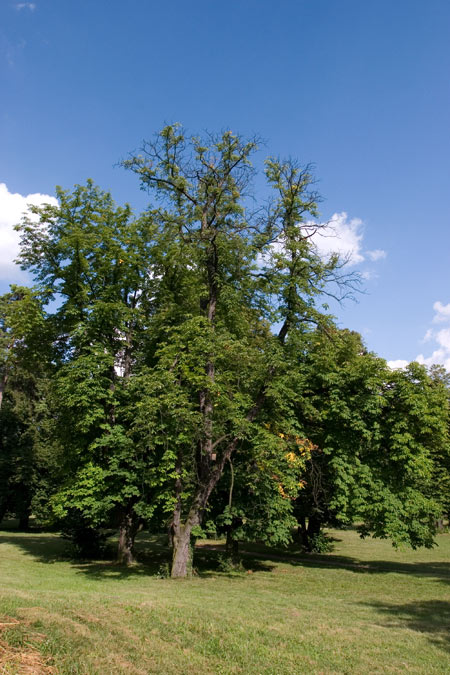
If you want to evoke polar filter, choose a landscape photo rich in green and blue colors. If the blue of the sky is quite vivid originally, the effect will be even more dramatic. The change will not be very conspicuous in a picture that has flat and lifeless greens and blues.
The usual…
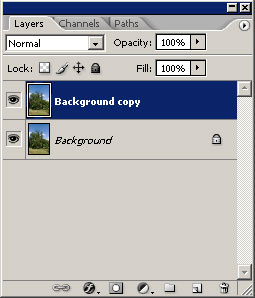
We begin with the usual step: Duplicate the background layer with —let’s say— Layer/Duplicate Layer command, and the new layer should be selected.
Little red
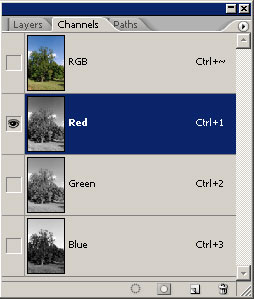
Now shift to Channels palette and select Red channel. Click Ctrl+A and Ctrl+C. In doing so, you will select the contents of the channel and place them onto the clipboard.
Find and click in the menu Image/Mode/Lab Color and shift from RGB to Lab mode.
A copy

Lab channels consist of a Lightness and two color channels (a+b). Click on Lightness and press Ctrl+V. With this, you will copy the former red channel here.
There’s nothing else to do in Lab color mode, and so in Image/Mode menu change back to RGB Color.
Step carefully!
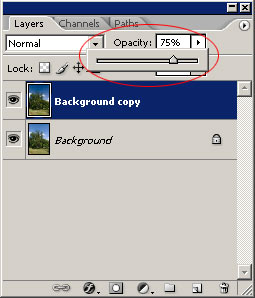
It’s time for us to return to Layers palette, where the upper layer already shows the result. If you find it too strong, decrease transparency in the Opacity slider, this way you will mix it with the layer below.
If you are satisfied with the result, click Layer/Flatten Image to merge the layers, and save your photo afterwards.
Deep blue skies
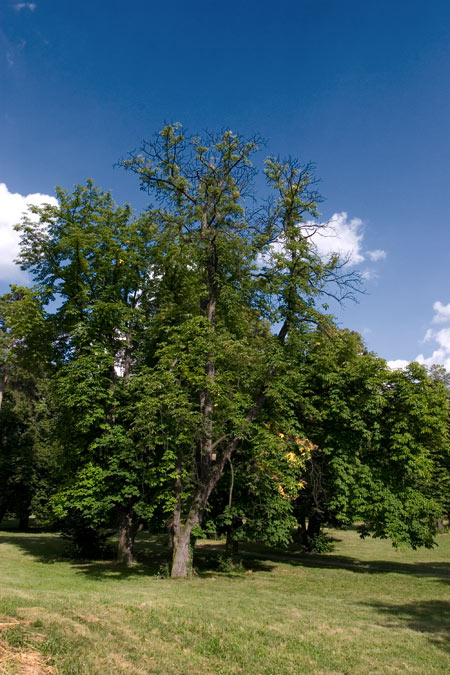
The sky received a much deeper blue, which makes the edge of the clouds more definite. The contrast of the greens has also increased, which greatly invigorates the foliage.