Retro photos instantly.
Had enough of 1-click image editing softwares that convert photos only after they had been taken? Would you like to see the result at the time of taking the pic already? Then Retrica is for you in case you want vintage style (like Instagram).
This is an app running on android or other mobile device (smartphone, tablet) that enables you to take and save nice vintage style photos with just a few taps on the screen.
Creators of Retrica think that a camera software does not necessarily need to have a retro effect. And they are right. Program writers sometimes carry things too far and zealously try to embody the given app in appearance as well. This software is attractive with its handsome and lucid user interface, and this integrity and simplicity is more to the advantage. Well, no revolutionary innovations here. Anyone who has used a camera software before will be able to navigate. It looks something like this:

Naturally, if you rotate the phone 90 degrees, the icons will also rotate 90 degrees to the left or right side of the screen.
It’s a shortcoming of Retrica that there are no traditional photo settings, so you can forget metering mode, focus mode or even exposition correction. There are effects only, which can be seen on screen already. Therefore the screen is a bit shaky (at least with Nexus 7 2013), but not too badly.
Options can be opened with the icons in the two upper corners of the screen and you can switch between the camera in the front and the back – if you have an appliance equipped with dual camera app.
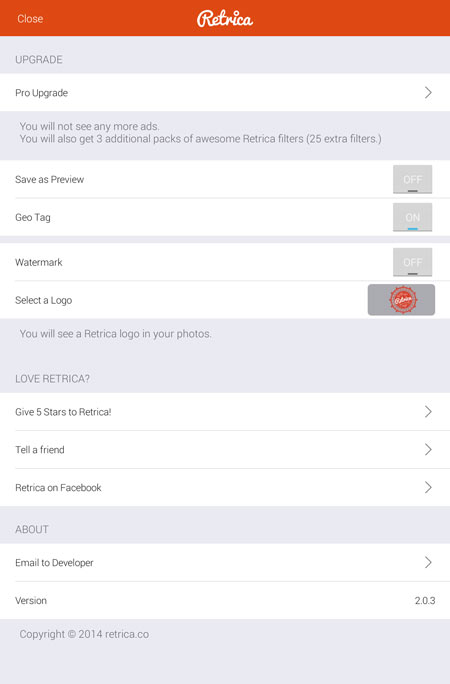
The range of setting options is quite narrow. In fact, only Geotagging and preview can be turned on and off, and you can browse among a few lovely ‘Retrica’ logos, which can be pasted in the corner of the photo as a watermark. Beside these, only the usual self-advertising is given and of course the option to purchase the Pro-version. The software is free, but the trial version annoys the user with the usual ads, and also it offers 25 less effects. As far as I remember also the resolution of the images that can be saved is restricted (to around 1 megapixel) in the free version.
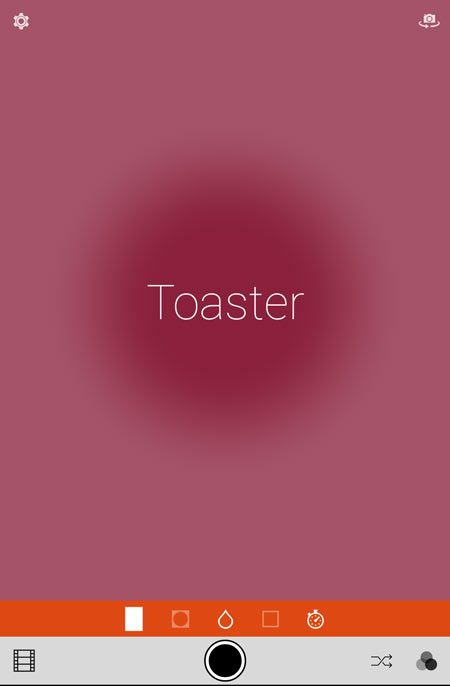
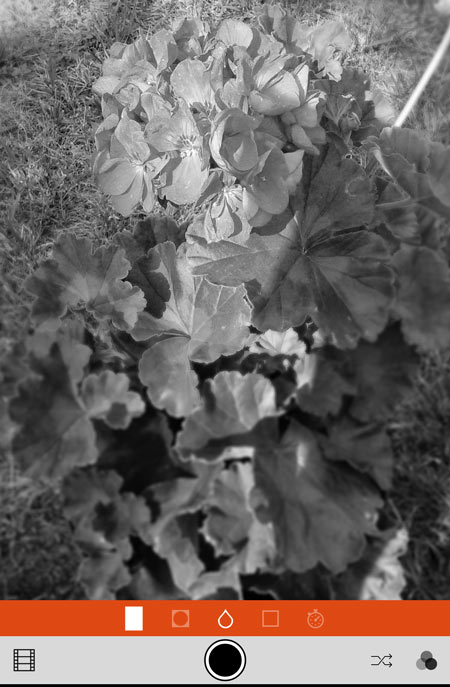
It’s absolutely simple to use it. The big black button in the bright part of toolbar is for exposing, which I think is quite obvious. The film icon in the left corner opens Retrica gallery, with the pics you have already taken. It’s not possible to add effects to a photo that has been taken, so you can just browse through your photos with the various effects you used.
The two icons in the other row randomly opens effects (cross arrows) and the effects menu.
There are 9 effects each in the nine main topics in the menu. If I count well, there are some 80 pre-programmed effects since there’re 7 in one topic instead of 9. The effect shows quite vaguely in the preview but if you point at them, they appear on the screen too.
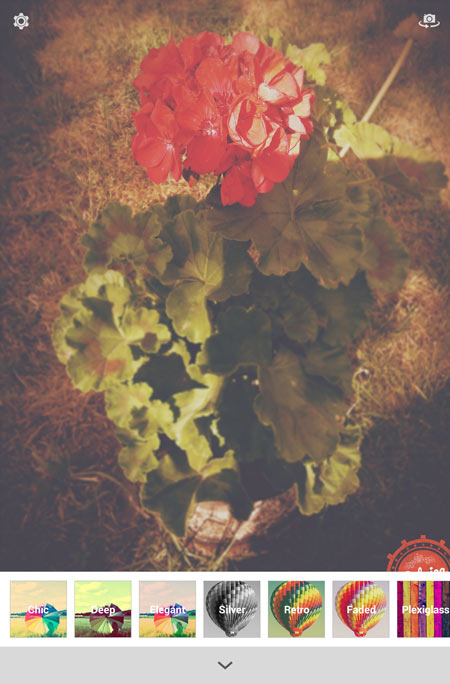
If you like the selected effect, you just have to poke at the exposition button and take the picture. The picture is automatically saved in the gallery, where you can delete or share it.
In case you would like to adjust the effect a bit, it is manageable to some extent. The orange icon row serves this purpose with the following options:
- image side ratio and number of photos
- vignettes
- out-of-focus blur
- frame
- timer
Use the first icon and a little menu appears on the screen, where you can select the side ratio (3:4, 1:1, 1:3), and the order of the images in case of more photos. If you take several images with one push of the button, there will still be 1 big picture saved with 1, 2, 3, 4 or 9 smaller images (so-called collage). If you want to take more photos the latency time can be set with the Timer icon.

If you touch the next two ions, no menu appears. They darken or blur the corners of the photo, which can also add to the vintage effect. Touch the screen anywhere to select the main topic, and this area will not be darkened or blurred by the software, only the surrounding areas. Move your two fingers towards or away from each other to decrease or increase this area.
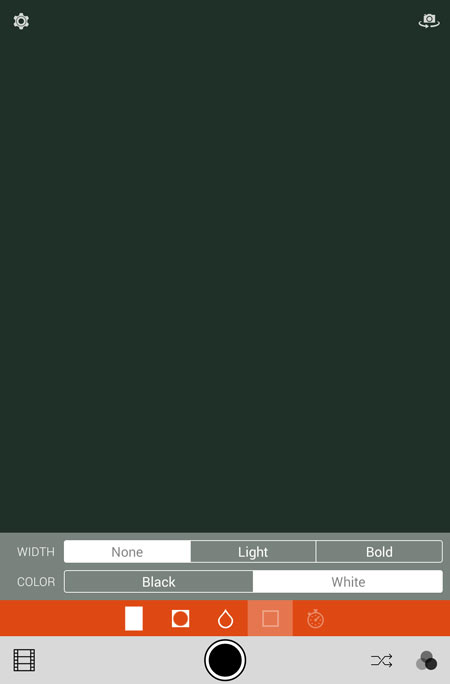
The fourth icon adds a frame to the saved photo, which can’t be seen while taking the photo only in the resulting image. The frame can be black or white. Besides, you can set the border’s thickness: Light or Bold. Use the None button to turn of the border function.
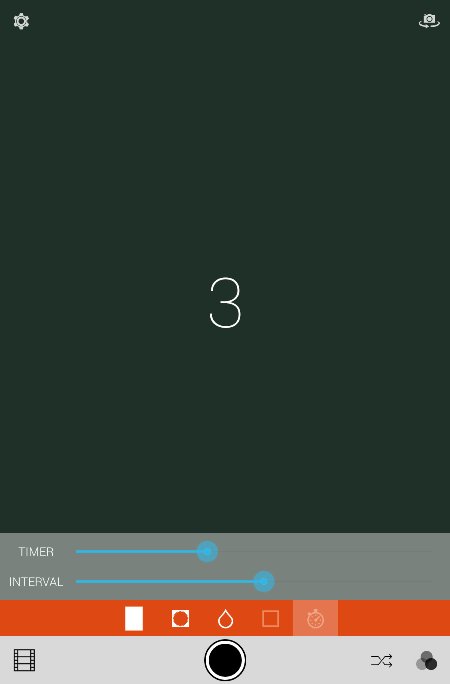
The click-shaped Self-Timer icon brings two sliders onto the image. You can set the delay action release with the upper one (Timer) to 1-10 seconds in degrees of 1 second. The bottom slider (Interval) is only interesting if you want to expose several pictures in one image. This slider sets the latency time between 0-2 seconds in degrees of 0.02 second.
It’s a nice and easy-to-use software, but what really matters is that it gives you usable vintage photo effects film effects, already when taking a picture. As it’s only 14 MB, it’s worth a shot.