Sharpening photoshop tips is one of the longest series of tutorials at DigiRetus. The eighth part deals with a command that is usually neglected. Sharpen More is a “dumb” in itself, a one-step command without settings, which we usually look over in the menu. Here comes the use of the “clever” layers in the picture, which will easily harness this unruly horse.
Step 1: Load the photo
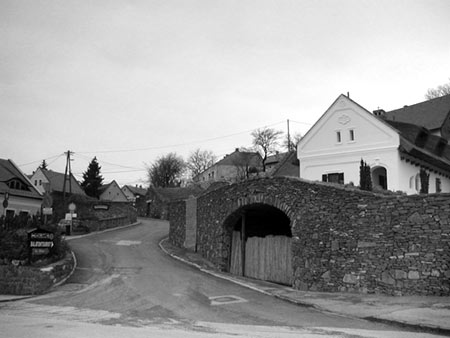
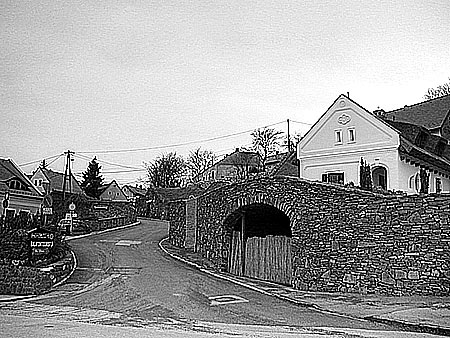
This black-and-white photo is a bit too soft, a little sharpening would perhaps do good to the fine details. Often the same dilemma comes up with big and sharp photos that have been zoomed out to web-size. Reduction of size usually results a softer outcome, the eyes yearn for more defined details. The algorithm of Photoshop CS versions (Image Size) contains Bicubic Sharper option, which creates a sharper resized result, but it has other good points apart from that too, so it is highly recommended, especially for users of older Photoshop versions.
Step 2: Good old friend
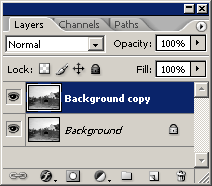
If you read our tutorials regularly, you already know that there’s no real Photoshop set of steps without the use of layers. Here, again, let’s duplicate the original layer with Layer/Duplicate Layer command. You can also achieve this by dragging the main layer onto the second element from the right in the bottom icons row.
It’s important that you remain on the new layer now (Background copy) since you will carry out sharpening here.
Step 3: This is a bit over-exaggarated
The duplicate layer allows for a more free editing, you can just as well use a “dumb” sharpening command. Such as Filter/Sharpen/Sharpen More, for example. It’s dumb because it works in itself and always with the same amount. The amount cannot be adjusted and so it is all the same in every picture. Just click on the menu point and it’s done.
Now you can freely use it several times even. Usually 1-2 times is enough though. For the second time it’s enough to press Ctrl+F key and the software will repeat the previous action. We used it 2x in the picture above. The result is quite deterring but that’s just what we needed.
Step 4: Let’s restrain the horse powers
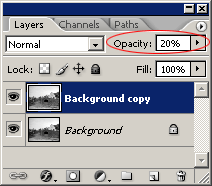
Not so fast with that sharpening! This amount is really too much for the picture, but with used it so that there’s a lot to be taken from. The duplicate layer comes handy for this, as the modifications have been carried out only on the upper layer, the original one below remained intact. Mix the two, and the desired mixture is ready for you.
Push down Opacity slider until the adequate sharpness is achieved. It is around 15-20% in our case, but do as you like.
Step 4: More edges

The edges have become more defined in the photo. It is especially evident in the fine details, such as the rubble walls or the branches of the distant trees.
Before saving, unify the two layers by Layer/ Flatten Image menu.