This photoshop article describes how you can make white buildings in your pictures a little more colorful. Who would think you’ll need an eraser tool for the coloring?
Step 1: Load the photo

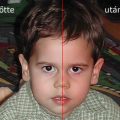
The white building on the right will make a perfect object for this procedure. You can paint the whitewashed walls to any color you like. You may want to choose a building with similarly large, homogeneous, plain surfaces.
Step 2: Mixing the layers

First, double-click the Background layer on the Layers palette, and click OK on the dialog that appears. This changes the background layer to a single movable and editable layer called Layer 0.
Now click the second button from the right on the bottom of the palette to create a brand new empty layer. This one will be called Layer 1, and after it appears on the palette, drag it under Layer 0.
Step 3: Plaster color

From the tools, select the paint bucket, and set a color you’d like as foreground color at the bottom of the tools palette. We chose a sky blue tint this time.
The selected layer is still the newly created one that we put under the picture layer. Click anywhere you want with the paint bucket tool. Check the Layers palette to see that the lower layer is filled with the selected color.
Step 4: Preparations
![]()
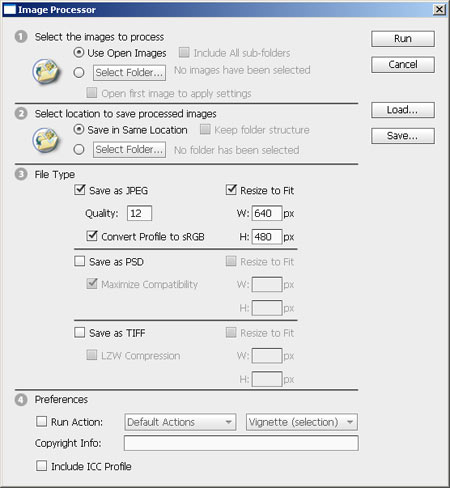
Now we have to change the house’s color to the same one. This will be the hardest part, and needs some preparations.
Select the Background Eraser Tool among the erasers (press E). In the options bar above, specify the values you see in the picture. The size of the eraser is unimportant. Among Sampling options, select Background Swatch, and set Limits to Find Edges. Make sure to set Tolerance to 100%.
Step 5: Bricklayer’s work

After you’re done with the settings, click the upper layer (Layer 0) on the Layers palette, and start painting. Or should we say, start erasing, since the tool will erase areas from the upper picture layer, so that the bottom monochrome layer shows through.
Select larger, contiguous areas and work along them with small clicks. Background Eraser erases the picture inside the size indicator circle, but always considers the pixel under the + sign in its center as the base. The erased (or in this case, recolored) pixels are those with exactly the same color and brightness as the pixel you click with the plus sign.
The Find Edges option makes Photoshop take edges into account and work “inside the lines” most of the time.
Step 6: When the brush goes wild
 Sometimes you’ll unavoidably erase (paint) areas you wanted to leave intact. Pay no heed to these during painting, since after you’re done, you can restore their original state using History Brush.
Select it from the tools (by pressing Y), set a size with hard edges and erase the areas that you painted accidentally. If you’re working along straight edges, you can select the area to be erased using the Polygonal Lasso tool (press L to select) before restoration. This way you’ll get straight edges by erasing.
Step 7: A different color

You can get a nicer result if you don’t paint the whole house to the same color but leave some areas out, or restore the original color in a few places afterwards, using the method described in the previous step.
Budai Petur