Step 1: Load the photo
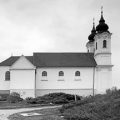
 Here’s the usual problem again. We shot a tall building from a short distance using a wide-angle lens, and tilted the camera so that the building fit into the picture. Due to this, the building looks a bit (or a lot) tilted. We tried straightening such things four times already, but let’s try it once again with a very different method.
Step 2: Picture postcard
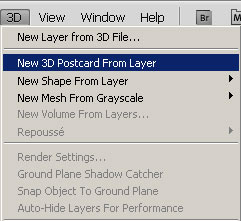 The handling of 3D objects and the 3D menu appeared first in Photoshop CS4. This menu is where the New 3D Postcard From Layer feature resides. Basically, it provides a flat sheet which can freely be rotated and tilted in space.
However, before you start using it, select Enable OpenGL Drawing on the Edit/Preferences/Performance dialog, which turns on hardware 3D acceleration, if your graphics card supports it.
Now you can try New 3D Postcard…, which does not seem to do anything, when you click it.
Step 3: Tilt and rotate
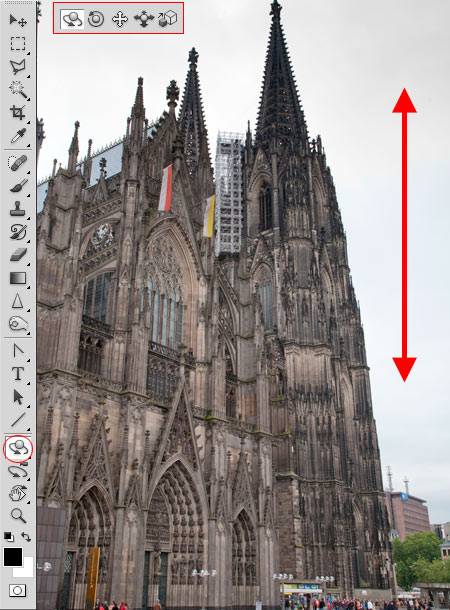
You will immediately find out what happened when you try to rotate the picture. The 3D positioning tools are on the bottom part of the palette. Click the indicated button.
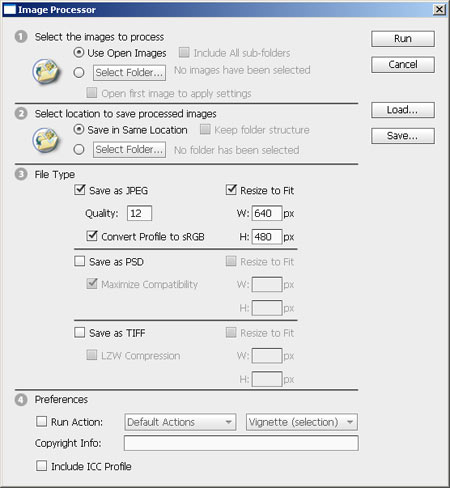
Above, in the options bar, you’ll see the five buttons marked in the picture. Their functions, respectively, are:
1.: Tilts and rotates the layer freely.
2.: Rotates the layer sideways.
3.: Moves the layer up/down and left/right.
4.: Zoom in or out.
5.: Enlarge or diminish.
You’ll need the first four of them, but mainly the first one. Click it, then click the image and drag downwards or upwards. Dragging downwards straightens out backwards tilting buildings.
Use the second icon to rotate the picture slightly if necessary.
Then you can finalize the area to be cropped using the third and fourth tools.
Due to perspective correction, your image is not a rectangle but a trapezoid. This is why it needs to be cropped to a rectangle form. Before doing so, you need to return to 2D mode, so click 3D/Rasterize.
Step 4: Straight-backed
 Now you can crop those unwanted edges freely, or, if the correction was very minor, you can use the Spot Healing Brush Content-Aware methodto fill in the holes (if you’re using versions CS5 and up). After all this, the photo probably needs some sharpening which affects small details.
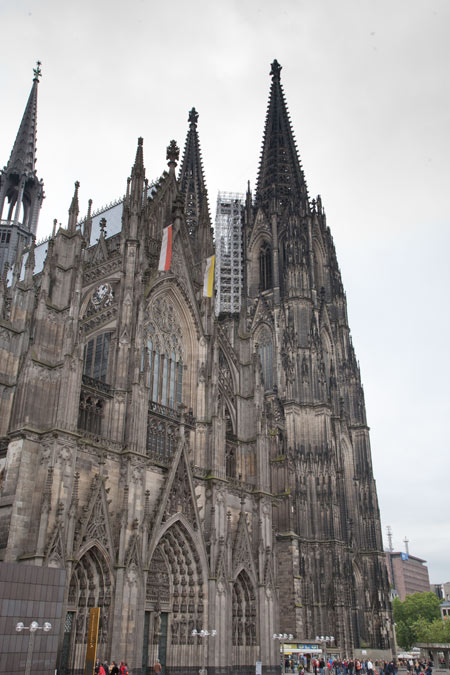
Now the building is as straight as it should be.