It is a well known issue, particularly when using small cameras with built-in flashes, that your photo subject looks back from the photo with a pale face if you flashed them straight in the face. Wax-like colors and marble-like liveliness don’t do much good to a portrait, so we took the effort and made a procedure to enhance facial colors. It’s not that difficult.
Open the photo in Photoshop
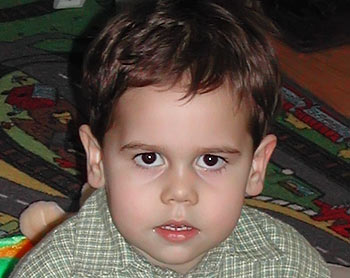
This respectable gentleman’s rosy cheeks have been bleached using a compact flash. No problem, we’ll restore them in an instant.
Solid color layer
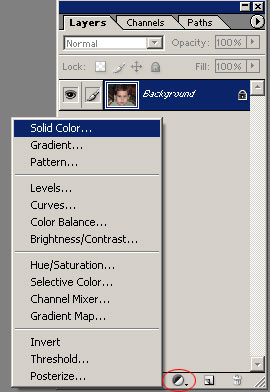
We need a color layer to do so. At the bottom of the Layers palette, click the indicated icon to add an adjustment layer, and choose Solid Color from the menu.
Tanned skin?
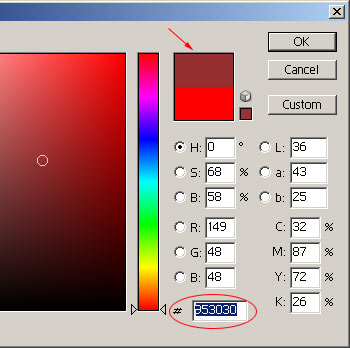
We recommend selecting a purple-brown color mix in the color picker. This will look rather tanned, or even unnaturally dark, at the first glance, but later you’ll have the possibility to refine its effect. Of course, you don’t have to use such a color—everything is determined by the qualities of your current photo. For example, such a facial color would look very strange in a picture that intentionally plays with cold colors.
For the picture in this article, we chose the color with the hex code 953030.
Holding back the colors

Select the Soft Light blending mode on the Layers palette, and set an appropriate Opacity value. In this particular case, this was 50%, but once again, it is the picture and your taste that decides.
If you want harder, stronger colors, choose Overlay instead of Soft Light.
Off with the rest
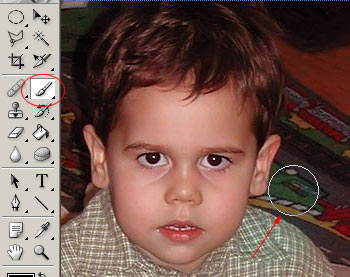
As the color layer has affected all the colors of the picture, you should eliminate its effect on the unwanted areas. Make sure the color layer and the (currently) white layer mask indicator next to the layer color stays selected.
Choose the Brush tool and a relatively large soft brush, and paint over the areas outside the face: clothes, background, perhaps even the hair. Leave only the skin surfaces untouched. Use a smaller brush to restore the whites of the eyes. Meanwhile, watch the colors returning to their original hues. Don’t mind if you sometimes reach the face while painting over, the mistake won’t be noticeable. If you still think you messed something up, select the Eraser tool. You can restore the colors affected by the color layer with it.
Full of life
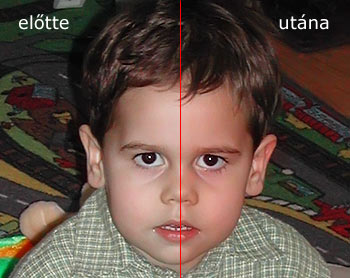
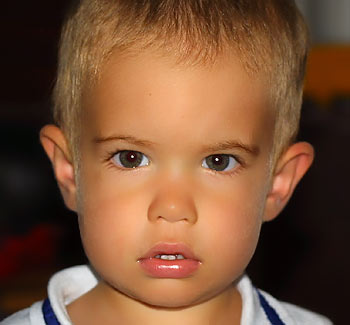
Before / After
The color of the face has become much livelier. You can still refine the final result adjusting Opacity. Lastly, merge the original background layer with the color layer (click Layer/Flatten Image) and save the picture.