If we wanted to make a categorical statement, we could say that until now, our plugin introductions have never exceeded mediocrity. A handy sharpening module by Jane Doe or a neat little noise filter by Joe Public. But now for something completely different—the informatively named Melancholytron plugin by Flaming Pear. The name is well chosen as the plugin allows you to extend the effects of pinhole cameras, old analog media and imperfect lenses on your digital photos.
Installing the plugin is simple, just copy Melancholytron-132.8bf (size: 672k) into the Plug-in folder of Photoshop or Photoshop Elements, and restart the application to display the plugin under Filter/Flaming Pear.

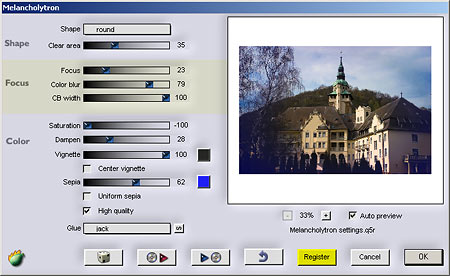
You’ll find many controls on the plugin’s dialog, but their number and layout still makes it easy to keep up with them. The right side is occupied by a preview image that shows the expected result of the current settings. Click here to drag the image in the pane. Below you can find controls for zoom and toggling Auto preview.
On the left side, there are 8 sliders, 2 dropdowns, 2 color pickers and 3 check boxes arranged into three sections: Shape, Focus, and Color.
Shape has an identically called dropdown that lets you choose the method for edge and corner damaging. Surely you all have seen blurred photos with darkened edges, taken with a pinhole camera. Damaging shape can be round, wide (top and bottom), or tall (sides). The Clear Area slider specifies how much the blurring and darkening of the edges/corners protrudes into the picture. Drag it to the left to leave only a small area of the original picture or to the right to apply only a slight effect in the corners. You can set the midpoint of damaging by clicking on the preview image. The quality degrades outward from the midpoint. The extent of degradation is defined by Clear Area.
Focus controls the extent of blurring. Low values produce a slight blur in the corners, and a soft transition, while higher values lead to more areas of the picture covered in blur.
Color Blur smears the colors even more in the blurred areas. The CB width slider has a similar effect. Higher values result in duller colors.

Saturation of the blurred areas can be set between +/-100. A value of +50 returns the original colors, while 0 removes any colors from the corners. -50 inverts the original. From these, you may have already found out that +100 and -100 represent strong saturation for original and inverted colors, respectively.
Dampen also affects colors, more exactly darkens stronger ones.
Vignette (aka edge darkening) is a well-known phenomenon in photography. Higher values produce more intensive darkening in the corners. The color picker right next to the slider opens a palette that lets you specify vignette coloration.
If you accidentally shifted the midpoint of the blurring shape, click Center Vignette to restore it.
The Sepia slider has a slightly misleading name as it can color the edges to any color you like. Just use the related color picker. Once again, the higher the value, the stronger the monochrome effect. The Uniform Sepia check box extends this effect to the whole of the photo—this way not only the edges get tinted, but also the middle of the image.
The last check box, High Quality, offers a nicer looking and more accurate result in exchange for increased calculation time.
The Glue dropdown basically offers a range of blending modes that work similarly to Photoshop’s layer blending feature. They allow edge damaging and discoloration to be mixed with the original picture. It’d be an arduous task to list all the various options as there are about 60 of them, but let’s say they can surely change the general feeling of a picture a great deal. You can use the small button on the right of the dropdown to scroll through the numerous possibilities. This lets you select the blending mode you want quickly and easily.

The four buttons under the described controls also deserve attention. The die “mixes” random settings but only affects the positions of sliders, it does not alter menus, color settings and check boxes. The next two buttons are for loading a previously saved preset and saving the current settings, while the fourth one undoes the last change.
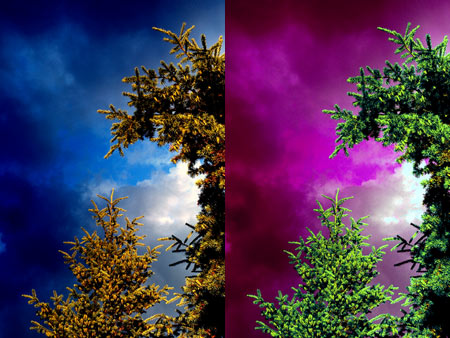
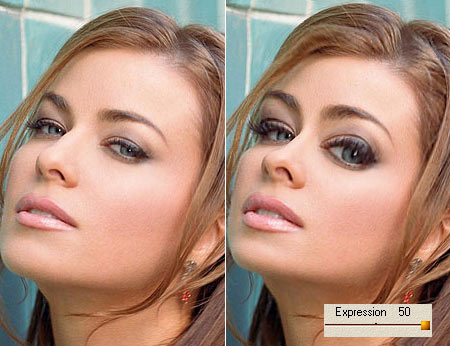
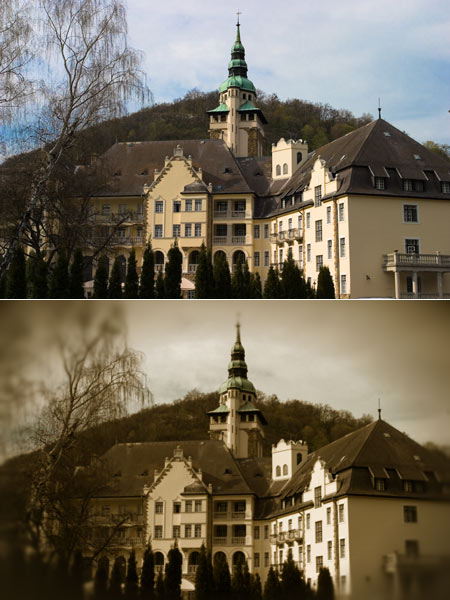
In the image below, you can see the original photo paired with a Melancholytron-enhanced version.
Melancholytron is a great way to have fun for all the digital retro-freaks longing for those minimalistic analog equipments from days of yore. However, it can also be recommended to people who like to experiment and don’t think of such rework of sterile digital photos as blasphemy.
The trial version can be downloaded from the developer and used for 30 days without any feature limitation.