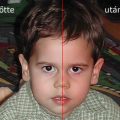
We want to carry out facial skin retouch but the multi-toned skin is not that easy to select. The face, which is of one color can obtain various hues in a photo. It requires meticulous work to cut around the area to be selected. Our method, however, solves the problem with a few clicks.
Load the photo

Our portrait is now loaded and we are ready for the skin retouch (not that the lady in this picture needs any), but what method should we choose for selecting the face with so various tones? Shall we cut them out? Only for time millionaires. A much quicker method is needed.
Not the best one
One of the tools at hand, Magic Wand Tool can be a good solution: click with it at any point of the picture, and the similarly colored areas around it will also be selected.
Still, clicking on a mid-tone has led to an unexpected result. The selection is patch-like, involves only the mid-tones, its size and opacity is difficult to define. The dashed-line silhouette does not reveal much.
Restart
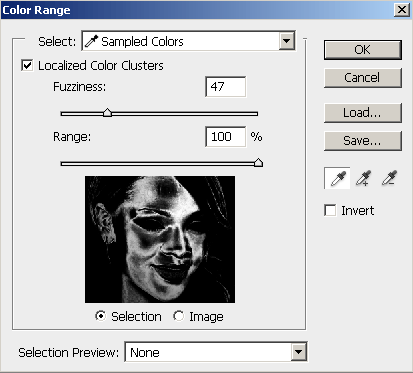
Let’s start from another direction. Choose Select/Color Range option, then in the small black-and-white preview of the appearing window click somewhere there where you did earlier. The brighter areas in the preview represent the selection, and the black ones are the unselected areas. The grey areas in-between represent opacity.
The result will be a similarly patch-like selection, which involves only a part of the face. In several places the selection is unsuccessful.
Step-by-step
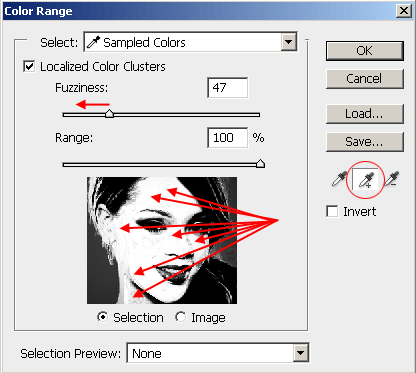
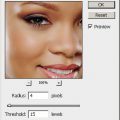
On the right, click on the eyedropper icon with the + sign, which will allow you to add further areas to the existing selection. Localized Color Clusters box at the top should be checked.
In the preview click on the areas in the face that are still black or grey, until much of the skin becomes white except for the hair, eyes and the mouth. This could well mean 20-25 clicks.
If the hair and the background are too bright, shift the Fuzziness slide above to the left to make the picture harder. This will make the bright areas even brighter and the dark ones even darker. You can remove the grey background from the selection by turning it black. The edges can be darkened by decreasing Range value.
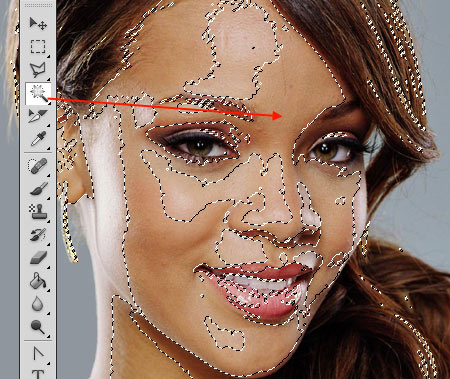
Much more exact
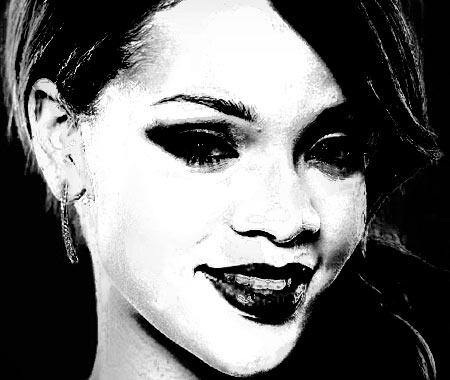
The picture above was made of the alpha channel of the photo.
As you can see, practically all of the face has now been selected and quite exactly. Let’s begin skin re-touch. It’s no problem if some grey, shady areas have been left. The later modifications will not be quite strong at these parts, but skin remains natural in case of smaller modifications since not all of it will be re-touched.
If you want an even better selection, visit us next week too.
We will continue with Refining selection of facial skin from here.