The previous article showed how to select a face, but now we are aiming at an even more perfect selection. It requires more work, of course, but it’s worth it. You’ll need at least CS5 version for the next steps.
Load the photo
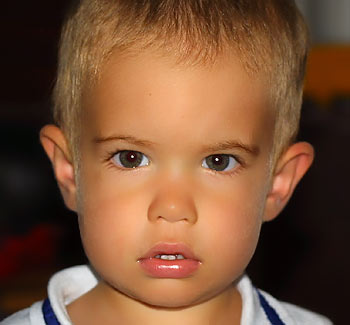
We are going to work with the same photo as the last time as the first steps are the same.
First, repeat the first four points of the previous article. Let’s continue from there.
Forward and a bit further
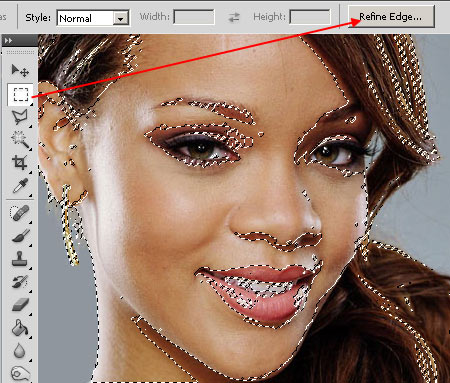
So, having completed the first four steps, we now have a quite well-selected face, but it could do with some refinement in fact. This becomes evident if you choose one of the selection tools and then Refine Edge button in the upper options row.
A bit rough
Alpha channel shown by Refine Edge reveals that there are quite a few areas left selected which should not be selected, such as the brighter spots in the hair, the ayes and the mouth. Every white spot becomes selected and will be incorporated in the corrected areas, so if you wish to blur the skin, these will also be blurred. What’s more, their selection edge is quite rough, to put it mildly.
Along the eyes
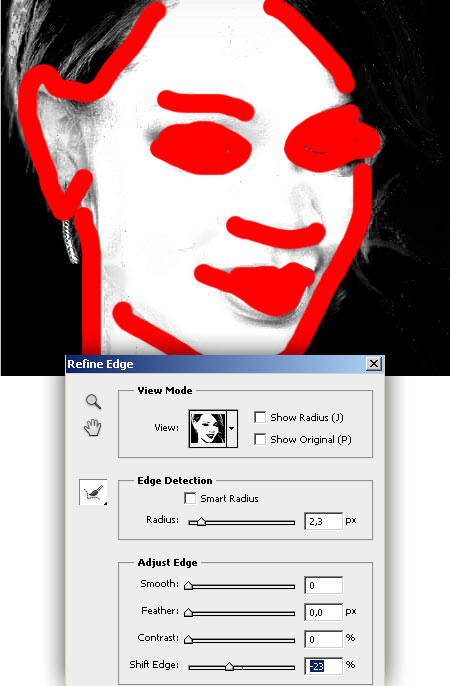
You can cure this by painting over in Refine Edge window the edges where the skin and the hair meet and the area of the eyes, eyebrows and nose.
Set Edge Detection Radius value at around 2 pixels, and you can also decrease Shift Edge value if the photo does not have enough contrasts.
As a result, the selection edges become much softer and will fit the curves and shadows of the face much better.
Alpha
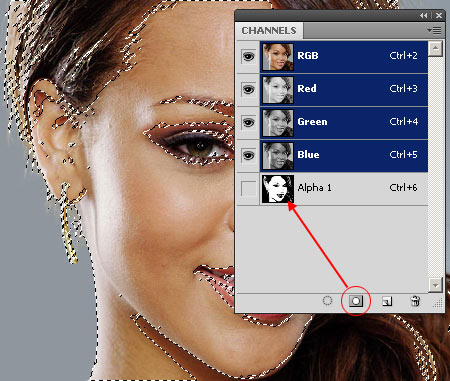
After refining our selection, we should exclude the parts that we do not want to modify. We don’t want to change the hair, the mouth or the eyes.
Click the second bottom icon in Channels palette, which will create an alpha channel from the existing selection.
Click on the name of the channel to turn it editable, but before that click Ctrl+D to remove the existing selection. The selection will be in alpha channel from now on.
Can take eyes off
Grab a simple black brush with possibly soft edge and paint over the areas brighter than face, the hair, eyebrows, eyes and mouth. These black spots are now excluded from the selection.
Then keep Ctrl button pressed and left-click with the mouse on the small preview window of Alpha channel (in Channels palette). Our selection is active again, this time without the eyes and mouth.
Finally
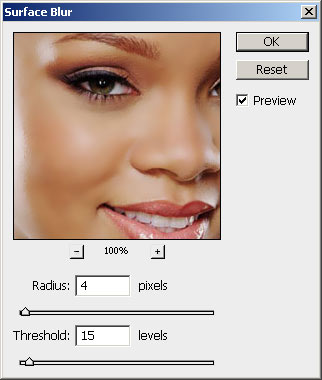
Our selection is ready and is restricted to the facial skin, and you can do with it whatever you want, like change its color or brightness.
We used Surface Blur, which made the face quite smooth while leaving the major details of the face untouched. Thanks to the good selection.