Curves command is our old friend, but it offers a few new features in the new Photoshop version.
Load the photo

Most readers are surely familiar with Curves tool in Photoshop. You can often turn to this tool when you want to adjust brightness, contrast of your photo. The new version of PS (CS5) has made it even more precise and more comfortable to use. We are now introducing such a new comfortable feature.
First, load a photo where you would like to adjust brightness and/or contrast.
New icon
You’ll find Curves tool under Image/Adjustments/Curves menu.
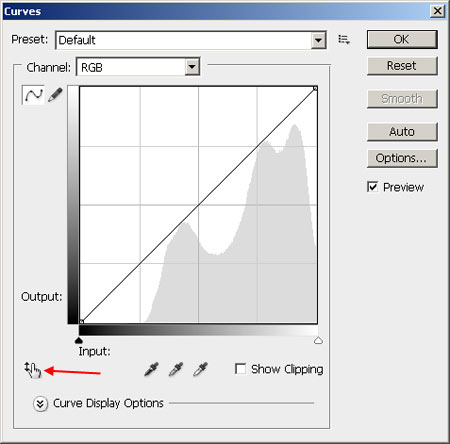
There’s a new icon at the bottom left side of the appearing window. Click on it, then drag the mouse pointer over any point of the photo. You can see in the histogram panel that the software indicates the brightness of the given point where the mouse pointer is.
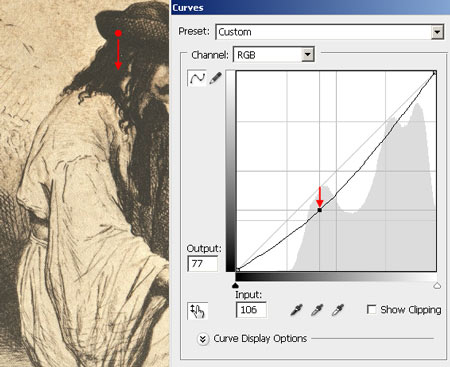
Reference point
If you click on a point of the photo, a reference point appears at the corresponding point on the curve. If you drag this point in a preferred direction, you can modify the brightness relevant to the reference point.
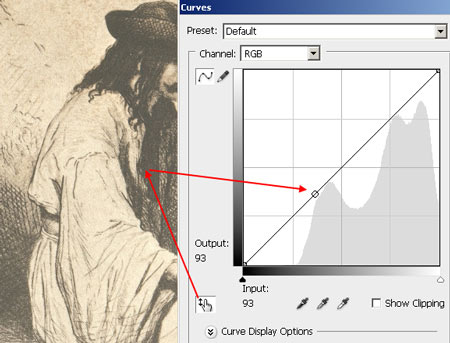
You can set several reference points in the picture and thus in the histogram.
Right away
If you click on this point and move the mouse up or down keeping the button pressed, you can modify the curve thereby changing the brightness and contrast of the image.
More strident

A few clicks and slightly dragging the mouse pointer has filled the photo with contrast without turning the bright areas too dark since we can adjust brightness separately with the aid of the reference points.