In the previous Photoshop article, we placed four separate images onto a single new background (canvas) and arranged them beside each other. Below, you’ll learn how to turn this creation into a picture postcard like the ones you can get at the newsagent around the corner.
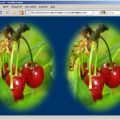
This is where we left off
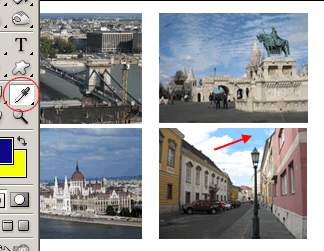
First, change the background to a color that is featured in one of the components. We chose a nice sky blue using the Eyedropper Tool (press I to activate). Now switch to the Paint Bucket Tool (press G), and click Background on the Layers palette. Click the white area around the picture components with the paint bucket. The background will change to the color you chose.
Do it with style
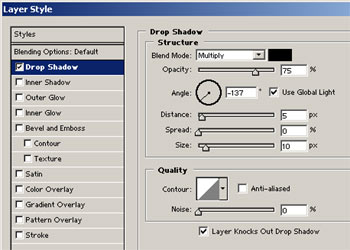
Return to the layer of a component and double-click beside its name on the Layers palette. The Layer Style dialog will be displayed. It can be used to apply various effects to the selected layer, such as drop shadow, color gradient, pattern fill, color border, etc.
First, select Drop Shadow and set Angle to about -140. This is the angle of the imaginary main light source for the shadow Set the shadow Size to about 10 pixels.
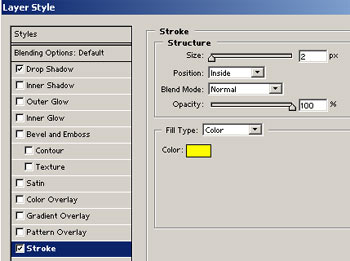
Now select Stroke, set Size to 2 pixels, and Positionto Inside. Choose a Color you like (one which matches the blue background nicely). As a counterpoint to blue, we chose yellow.
All the same
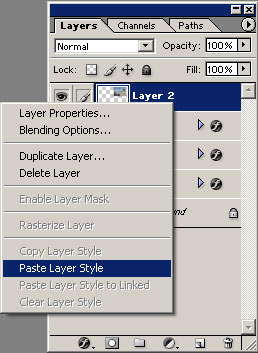
The layer styles you have set are only affecting a single layer. It would be rather tedious to set them individually for all the layers every time. So, we shall copy them instead.
Right-click the layer affected by the styles and click Copy Layer Style in the context menu. Switch to the next layer, right-click again and click Paste Layer Style. Repeat the procedure for all the remaining layers—except the lower background layer—to make the specified layer styles globally effective.
A background for the caption
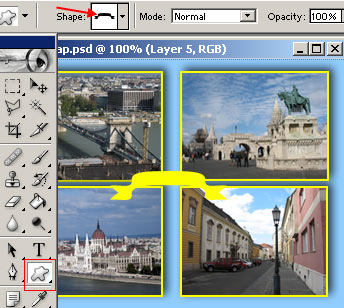
Let’s create a caption for the postcard to make the illusion perfect!
You’ll need a background to do so. Use the Custom Shape Tool on the Tools palette. Under Shapeamong the options at the top, select an appropriate shape, e.g. the ribbon you can see in our picture. Keep the foreground color the same as that of the borders (in this case, yellow), and make sure the third button (Fill pixels) is selected in the left-side option button row.
Click the picture and drag the mouse to draw the shape, and then use the arrow keys to place it accurately.
Captioning
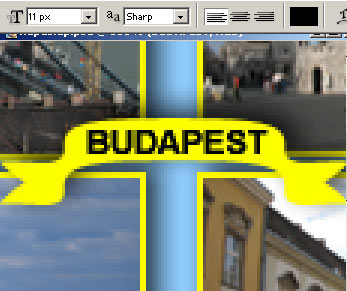
The last step is to create the actual caption. Press T, or select the Horizontal Type Tool from the Tools palette.
On the options bar, specify the font (we chose Arial), font size (11 px) and color (black).
Click the yellow ribbon, start typing, and finally click Vto place the text precisely using the arrow keys.
Greetings from…
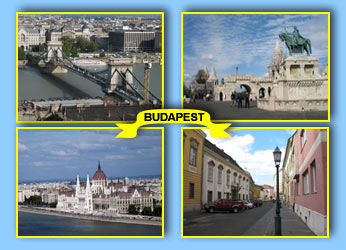
Now you have a real “retro” postcard! If you want to print it, start the complete procedure with a document size of 1600×1200 pixels, and specify a print size of 10×15 cms. For e-mail usage, a size of 640×480 or 800×600 will be perfect.