As the holidays draw near, we’d like to contribute to the Christmas feeling in our own way—this tip helps you prepare a very simple but solemn greeting card to print and send to your friends and relatives. You don’t need to be very good at drawing as Photoshop contains built-in templates that can be colored to conjure up a Christmas atmosphere.
Open the photo in Photoshop

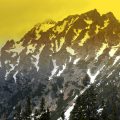
Choose a photo that is suitable to be used as a greeting card. It may be a photo taken at an earlier Christmas, a winter landscape or a detail of a pine tree. Keep in mind that a 2-megapixel digital image (of about 1600 x 1200 pixels) is ideal for a 10×15 cm (4”x6”) paper photo. Naturally, the image can be smaller or larger, this is just a recommendation.
First, we put a frame around the picture. Click Layer/New/Layer to create a new layer above the original, and press Ctrl+A to select the whole image. Click Select/Modify/Border and specify a value of cca. 100 pixels. We’re talking about a photo of 1600 x 1200 pixels, so you’ll have to increase or decrease this value in proportion with your own image. Double-click the color picker square on the toolbar, and choose a warm yellow. Press G to switch to the paint bucket tool, and click the selected border on the image.
If you’ve done everything well, you now have a yellow border with soft transition on a separate layer, as illustrated above. Now press Ctrl+D to delete the current selection. We won’t be needing it anymore.
Shapes
Once again, click Layer/New/Layer to create another layer. Press U, and select the icon you can see in the upper left corner of our illustration. This is the custom shape drawing tool. Select the template you want from the Shape dropdown. Click the indicated banner. If you can’t find it among the templates, click the arrow button in the upper right corner, and select All. Now you should have no problem finding the banner.
Banner
Hold down Shift and drag your mouse pointer from left to right at the bottom of the photo. You can see the contours of the selected shape grow. If you have reached the size you want, release the mouse button. Now you have a banner. It may not be exactly aligned, but never mind. Press V and nudge the banner to the desired location at the bottom of the picture. Make it look something like our illustration.
All is not gold…
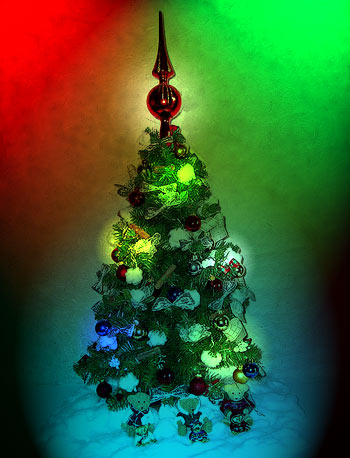
Click Layer/Layer Style/Blending Options. The effects active for the current layer (that is, the banner template) are displayed on the left side of the dialog. Click Outer Glow to select it. On the right, under Elements, set Size to about 125 (or anything you like).
Now click Gradient Overlay on the left. On the right, double-click Gradient and choose a preset that looks like gold. Return to the effect options, and set Angle to 180 degrees. Now click OK to close the dialog. The result is the golden transition and the halo you can see above.
Yet another ornament

Create another layer again as described in section 2, and select another shape for it. This will be some mistletoe. Draw the shape on the picture as described in section 3, and align it to the lower edge of the golden ribbon. Now adjust the layer effects as in section 4. Click the Drop Shadow effect and set Size to 25 (or anything you like, again). Select Color Overlay and double-click the color picker on the right. Choose a green color. Set Blend mode to Overlay. Next, set up Gradient Overlay. Double-click Gradient on the right (as in the previous section), and select a greyish transition. Return to the settings and set Angle to 180 degrees here as well. The result can be seen above.
Greeting text
![]()
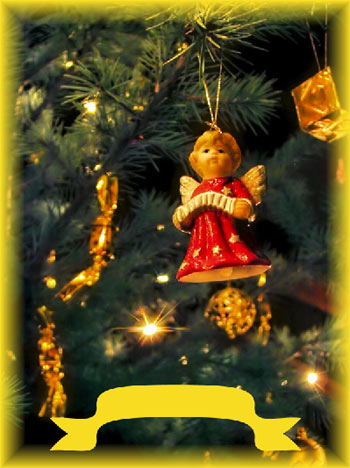
Now you have to add some text to the banner. Press T to select the Type Tool. Choose a font you think appropriate and a size that looks pleasant when used in the golden banner. Also choose a text color. For example, claret fits gold well.
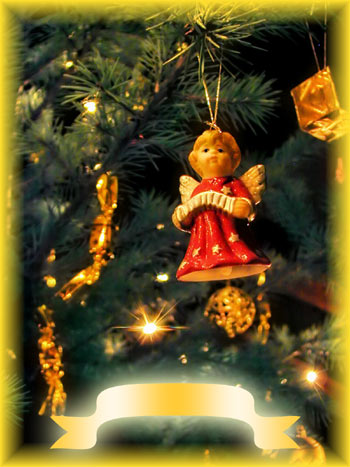
Finally, click the indicated icon, select Arc, and set Bend to +10 to create a slight arc in the text to make it fit the golden banner better. Close the dialog, press V, and nudge the text onto the banner with the arrow keys. The result should look like the image above. All you have to do is to merge the layers by clicking Layer/Flatten Image, save the picture and print it.
Merry Christmas!

The result should look like the image above. All you have to do is to merge the layers by clicking Layer/Flatten Image, save the picture and print it. It is recommended to resize the image before saving. Click Image/Image Size and set Resolution to 300. Now set Width and Height to 112 and 150 mm (4.5” and 6”), respectively. If the picture has a portrait orientation instead, swap the values. This is approximately the 11×15 cm (4.5”x6”) print size for pictures with a 4:3 size ratio. The greeting card’s finished.