When it comes to noise, we can see “ants” swarming and “confetti rain”. The former is the so-called luminance noise, which can seriously interfere with details of the photo. We have tried in several articles to decrease color noise (or confetti rain if you like). Luminance noise is a bit more stubborn and so harder to make it go away without a trace. The new versions of Photoshop offer a separate menu for eliminating this noise. DigiRetus, however, always goes off the beaten track. This time too there is a way.
Load the photo in Photoshop

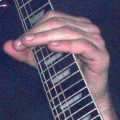
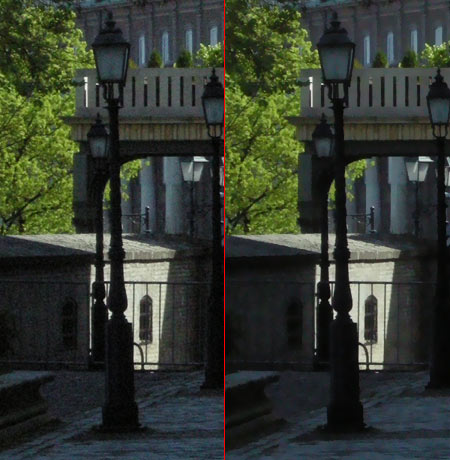
Luminance noise in this excerpt, especially the shady parts, is quite strong, but the “poppy seeds” ruining the photo will be soon gone.
True, there’s color noise as well to some extent, but let’s neglect it now. Those who wish to immerse in color noise, please click on one of the links at the bottom of the page.
We can only get in the near of luminance noise if we can set it apart from color noise data.
Head for the lab!

Nothing can be easier. This is exactly what LAB color mode is for. Click on Image/Mode/Lab Color menu, and bang on you are in Lab mode. Colors have not changed and seemingly nothing at all happened, but if you click on Channels palette, you’ll see that we received a Lightness and two color channels (a and b). Select Lightness Channel as that will be used later on. This contains all the details of lightness in the picture, as well as luminance noise. If you succeed in sorting out Lightness channel, luminance noise will also be gone.
Washday
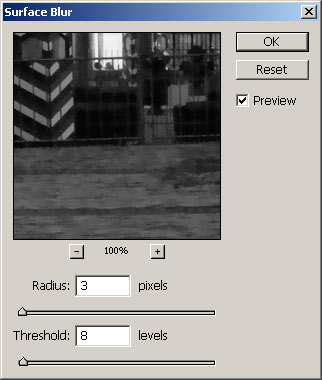
To achieve this, choose Filter/Blur/Surface Blur effect.
We set Radius at 3 for our fairly bad noise. In case of a not so conspicuous noise a value of 4-5 may well be appropriate. It’s not a good idea to exaggarate it as it ruins contrast (it affects it anyways).
After you are done with the settings above, increase the Thresholdvalue carefully. Preferably go step by step and check the results in the Preview (the Preview option should be selected). If the value is increased, the program will blur the areas with less contrast. Be careful: if you go up the slider too much, the photo may look like a stonewashed watercolor painting. We should find a value where the details of the noise are quite blurred but not yet obscured. We stopped at the value 8.
Noiseless
Finally go back to RGB mode – Image/Mode/RGB Color.
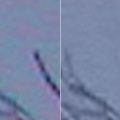
The end-result is shown on the right side. The original picture part is to the left. Though blurring removed the fine details yet the result is still photo-like, and what matters is that luminance noise has also been wiped out.