It’s been a while since we dealt with applying borders. What a funny pastime! The possibilities are endless, imagination can soar. Now we’ll show you a bit more freely interpreted and frivolous border which takes a little craft of the hand and you’ll need your imagination as well. Nevertheless, it’s definitely worth the effort.
Load the photo in Photoshop
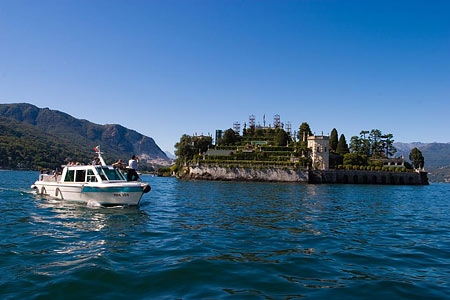
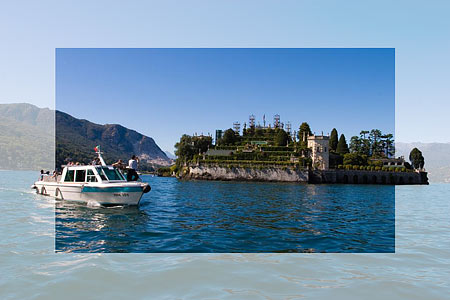
There’s a lot of space at the top and the bottom of this photo while we are a bit limited on the sides due to the accentuated themes (ship, island). Well, what if we get a little crazy and apply borders in a way that they lap over the back of the ship and the right side of the island?
Let’s paint a mask.

First of all, you need to select the parts that will run over the borders. Let’s use a manual method, namely the Quick Mask mode.
Click the framed icon at the bottom of the toolbar and then choose a medium-sized brush. 15-30 pixels will do. It is better if the brush has sharp edges rather than soft ones. I suggest that you enlarge the preview – it will be easier to work with it. Paint a mask onto the parts you would like to lap over the wide borders. Now shift to a smaller brush size (cca. 2-5 pixels) and paint the finer details as well. In case of a blunder, you can easily delete things with the rubber in the third line.
We selected the right side of the island and — to keep the symmetry of the picture — the tail of the ship on the other side.
Once you’ve finished, click on the button right to the framed Quick Mask (bottom of toolbar), and so you’ll get back to normal view. The painted areas will be gone. Or rather, they have turned into a marquee. The whole picture will be selected except for these two sections.
The edges of he border
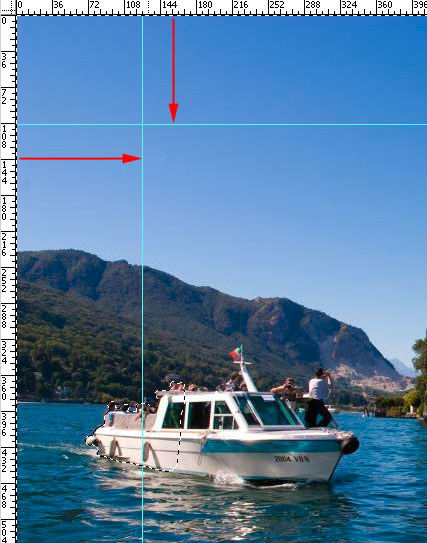
Select the border area. It is useful to turn on the rulers (View/Rulers) when you do the next steps. Click on the upper measuring line and draw a horizontal guideline as far as you want to last the top and the bottom of the border.
Then click on the left-side ruler and drag the mouse onto the picture thereby creating a vertical line between the top and bottom of the border. Since the selected two areas will overlap these parts, try not to draw the borders inside the selected area. You can see the selected vertical guidelines in the photo above. This is the inner side of the border. The dashed line on the ship and the island show the edges of the area you painted during the previous step.
The inner “circle”
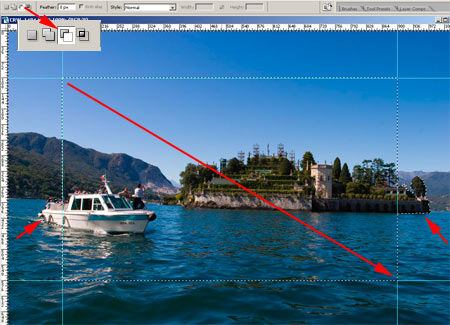
As we selected the whole picture with the first two steps — except the two painted areas — we now need to narrow down the selected area and convert it into a border. The guidelines will be of help here. Select the rectangular marquee tool and then click on the third icon (Substract from selection) in the upper options toolbar. This way you can cut out a part from an existing selection. Now draw a rectangle around the picture area outlined by the guidelines. Cut out this area from the selection and now only the wide border will be part of this. Neither the tail of the ship nor the right side of the island is part of the selection.
Set you free
You’ve got the selected area. In fact, you can do with it whatever you like. You can fill it with any color, you can blur or switch to inverse colors. Possibilities are practically infinite.
We opted for brightening here. We used Image/Adjustments/Levels for this. On the bottom of the dialog, we dragged the black arrow on the Output Levels slider to the right until the borders got light enough.
Narrow spaces
The remaining selection outlines can be removed by hitting Ctrl+D, while the irrelevant guidelines will disappear by using the View / Clear Guides menu. The result is a typical border with a bit of a funky touch to it. The picture elements sticking out of the borders add a special mood and the feeling of extra space.