We recently discussed one of the new blending modes in Photoshop CS5, and now we’re going to examine the other one. We’ll use it to create a picture with a rough, hard contrast.
Load the photo in Photoshop

A few weeks ago we touched one of the novelties in Photoshop CS5, the Divide blending mode, which we used to imitate a strongly overexposed (high-key) effect. The other new feature allows a contrast increase, for which you only need a photo with a low contrast.
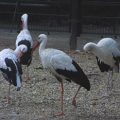
The above picture does quite nicely in the corners, but due to the backlight, the rest of the photo needs some hardening.
Subtraction

First, click Layer/Duplicate Layer to make a copy of the existing layer, then set the blending mode from Normal to Subtract. This is our secret weapon.
What happened? You got a totally black image? You’ve done everything perfectly!
One after the other
Well, we’re on the upper layer, which needs to be inverted. Click Image/Adjustments/Invert. Now, the change, the extremely rough contrast, becomes visible, affecting mainly the darker areas and the midtones, but not burning out the light parts even more.
Color saturation also increased visibly. if you find the picture satisfying, skip to step 4, but if you find the colors too intense, click Image/Adjustments/Desaturate. This turns the upper inverted layer into grayscale and therefore the colors of the final image won’t change. We used this procedure.
Not so fast!
All we have left is the final fine-tuning. Use the Opacity slider on the Layers palette to decrease contrast to the intensity you like.
Hard rock
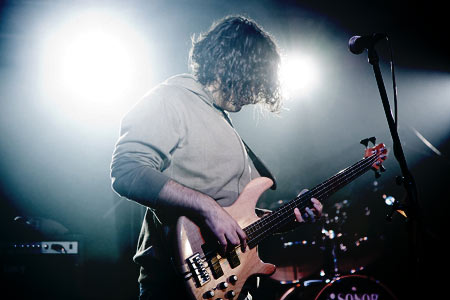
The picture got a hard, rough contrast, and became more expressive and substantial.