You can learn to live with photos that lack contrast painfully, but you needn’t. Fresh Photoshoppers usually find the AutoContrast feature as one of their first steps. Many times, it can bring good results, but most of the time it won’t, and you cannot adjust the fully automated feature. This tip introduces a less obvious but much more effective method.
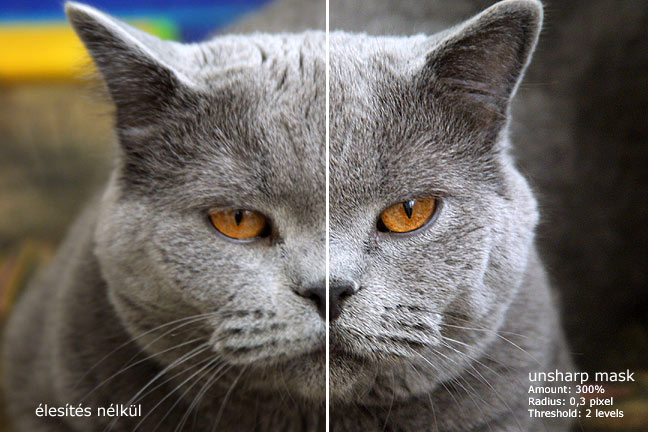
First of all, keep in mind that over-increasing lightness contrast will kill some details of the photos, and can lead to some areas becoming black and others white, also losing their details. If you don’t want to do this explicitly on purpose, take care while modifying contrast.
You want to increase the contrast of the image. You can easily click Image/Adjustments/Auto Contrast, but this feature is way too much automated to bring fine results. Image/Adjustments/Brightness/Contrast offers a better way. We’ll also rely upon layer effect modes.
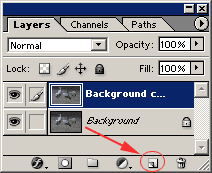
On the Layers palette, drag the name of the background layer onto the indicated icon to duplicate it.
The dropdown for general effect modes is in the upper left corner. Choose Soft Light mode. Contrast will change remarkably. If you need a really large increase, choose Overlay, or even Hard Light mode. Choose an effect mode that gives a somewhat stronger result than what you were looking for. We’ll refine it in a while.
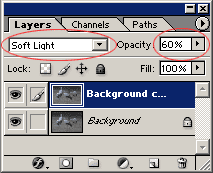
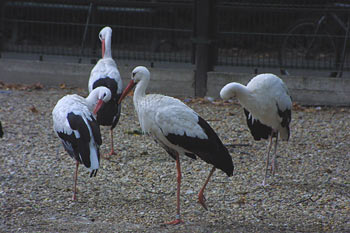
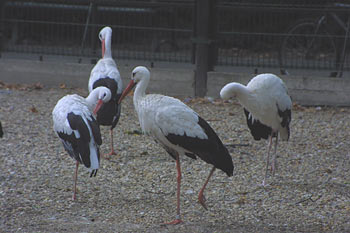
In order to do so, click the Opacity dropdown in the upper right corner. This sets the display ratio of the upper, modified layer and the lower original. An Opacity of 0% only shows the lower layer, and as you increase it towards 100%, the effect of the upper one gets stronger. Decrease the value to refine contrast. Take care to not leave annoyingly detailless (dark or light) areas in the picture. We have decreased the ratio to 60%. The result: