One of the basic requirements in photo editing is accuracy. It is a must to select the area or colors to be changed accurately. Photoshop’s Select menu has contained the rarely mentioned Similar command for several application versions. Now we briefly introduce this command, and thus explain how to select areas of a similar color but different brightness (e.g. the sky).
We want to select the sky in the picture to make various changes to it, for example, to modify its color. Selecting the sky also comes handy when you want to crop or edit the main theme, but it has a complex shape, several colors or hues. In such a case, if the background is relatively homogeneous, you will want to select it instead of the main theme, and then invert your selection.
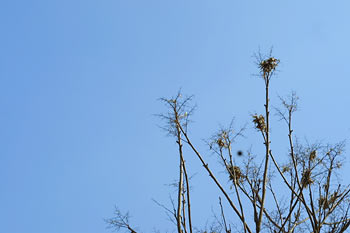
In our photo, you can see a slight hue transition in the blue sky. We want the lighter and darker parts to be included in the selection together. First, choose a selection tool (press M), e.g. rectangle. Then, drag a marquee over a typically colored area containing only blue sky. This way you can specify what types of areas the selection should contain. To get a more accurate result, hold Shift, and drag more marquees. Take care to avoid elements of the main theme (in this picture, the branches)!
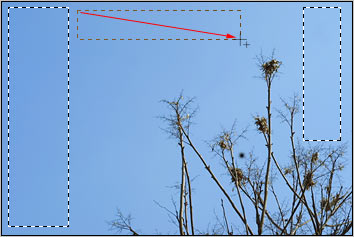
Click Select/Similar. This command makes the marquees and all the colors and tones similar to those areas selected. Hopefully, you managed to select all of the sky.

If you still have unselected areas, click Select/Grow to increase the selection. The result should be an outline that contains all of the sky, but none of the main theme.

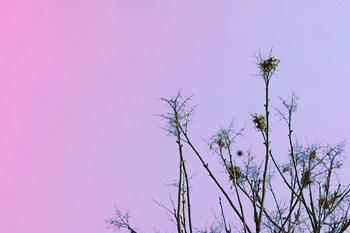
The changes you make afterwards will only affect the selection. In this example, we have used Image/Adjustments/Channel Mixer to touch up the color of the sky a bit.
If you want to change (e.g. lighten) the main theme instead of the background, right-click the selection and click Select Inverse in the context menu. You have inverted the selection and now all changes affect the areas previously unselected.