Another unwanted article! Surely there will be exclamations like that. Once again, we preferred a quick creative idea to literal photo editing work. This time, we’ll show you how to achieve a high quality comics effect with your photos. Usually, such a task requires a decent dexterity, creativity and a profound skill with curves. With our article, you’ll only have to repeat the procedure below. For those lazy people among you, we also prepared an action which can be downloaded free of charge.
Load the photo in Photoshop
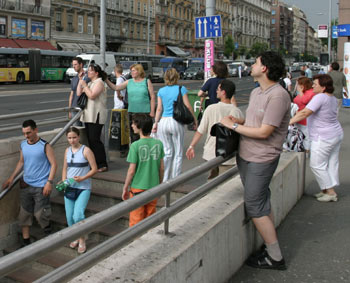
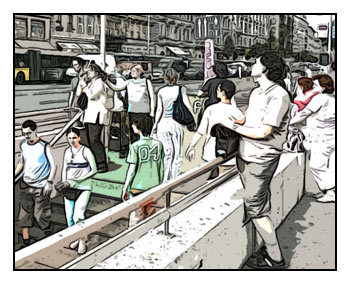
Let’s see what we can do with a street photo like this. As we will be reducing image size, choose a large picture, one that contains very little noise.
First of all, click Layer/Duplicate Layer. Make sure the copied upper layer stays selected for now.
Really unique!
Or should we rather say, “custom”. Photoshop has a filter with this name, although we have never used it before in these articles. Now it’s time!
Click Filter/Other/Custom, and specify the settings you can see above.
When you’re done, click Image/Adjustments/Desaturate to make colorless the lines you got. You’ll only need lines on this layer, not colors.
Soft lines

The lines you see are rather disheveled. Let’s make them softer! Click Filter/Stylize/Diffuse, and select Anisotropic.
Colors, roughly prepared
Colors in comics are not as rich as in real pictures. Return to the Background layer, and click Filter/Artistic/Cutout. Set No. of Levels to 4 as well as Edge Simplicity, and Edge Fidelity to 2.
Two halves
All you have to do is to merge the layers using the Overlay blending mode. If the thick black lines in the result are too weak, duplicate the Background copy layer, and set the new one to Multiply blending mode.
Comics
For a good result, reduce image size to about 50%. This way, the randomness of soft lines and the rough details won’t be so eye-catching, and noisier parts blend in better.
Comics effect is complete with a black-and-white border and a few text balloons.