Take a new or not old enough photo, tap, touch and wear it away digitally until it becomes dirty, stained and yellow.
Load the photo in Photoshop
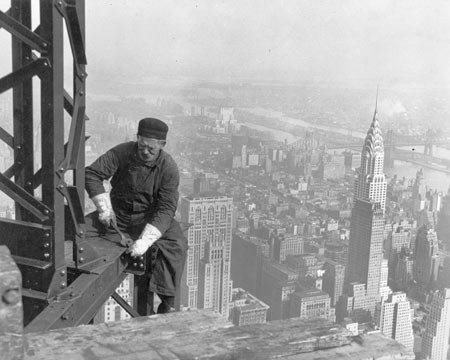
I know, I know. This photo is old enough in itself, but the actions below are effective in case of new photos too if you de-color them and decrease contrast a bit. It’s a good idea to choose a photo topic that matches the atmosphere of old times.
Stained and dirty

For this, you’ll need another photo, for example that of a stained, yellow, battered sheet of paper. The dexterous-handed can make one themselves, but the texture-sharing websites are loaded with such photos as well.
Start with re-sizing it so that it matches your original photo, then copy and paste it to clipboard using Ctrl+A and Ctrl+C.
Burned in
If you switch to the original picture you are about to modify and hit Ctrl+V, the software pastes the photo of the damaged sheet on a new layer over your original photo.
Use Color Burn blending mode to blend the content of the two layers. As a result, the top layer seems to have been burnt into the one below. If it’s too harsh, decrease opacity of the upper layer on the Opacity slider.
Mask on the layer

This damaged effect looks good in the corners and the edges, but the main theme has become too dark, the effect should be diminished there.
Click on the third icon from the bottom in layers palette (Add Layer Mask) to create a layer mask on the upper layer. Now you can decrease opacity of the various parts of the picture separately.
The essence

The newly created layer mask should remain selected and choose Eraser (E key) from the tools. Choose a relatively big brush with soft edges. We opted for 339 pixels so that the transition is as big as possible and the modification thus fits in the photo as perfectly as possible.
It’s also important to decrease opacity of the eraser in the options row (Opacity). It’s 20% in our case, but it can easily be smaller in your photo. This way you can proceed with small steps, making small adjustments with each click.
In the end, make short clicks with the eraser over the main themes of the image, and the damaged effect will gradually become less harsh. Don’t remove it, only weaken it in the relevant spots. The result will be pleasing also if you remove the effect in the middle section of the picture or significantly decrease the stain effect and only the corners remain damaged.
Worn out

Time has left its mark on the photo… virtually. The picture now looks old and battered because of the theme as well as the “chemistry of Photoshop”.