Let’s stick a little more with blending modes mentioned in our previous articles. This time it’s Divide to be detailed, which helps you not only in achieving a drawing effect but also in lightening dark parts of your photo without affecting the rest of the tones.
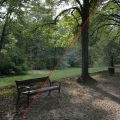
Load the photo in Photoshop

The task is given. Lighten the shady parts of the tree trunk without bleaching the right sunny spots on it. Obviously, it would be quite difficult to achieve it if at all.
Here’s, however, the newly introduced Divide blending mode. We created a drawing-like picture with it that was intensely over-lightened. The method we are about to use is quite similar but with a few differences.
As usual
The starting step is the same as the last time (and as usual). Duplicate the original layer by clicking Layer/Duplicate Layer. Switch the blending mode for the layers from Normal to Divide in Layers palette.
Again, we will start working on the upper layer, so stay there.
Two short ones…
Now there are two short steps to be taken. First use the Image/Adjustments/Desaturate command, which will help you remove colors of the upper layer.
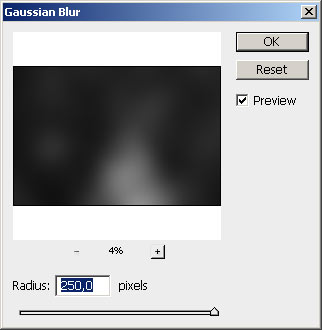
Then, staying on the upper layer, blur the image. For this, use Filter/Blur/Gaussian Blur, and choose a maximum blur value (+250 pixels) in the appearing window.
Some opacity
The picture now resembles the earlier over-lightened one. There’s no need to increase lightness, so return to Layers palette and decrease opacity of the upper layer (Opacity).
It’s best to set it to zero and then carefully shift the slider to the right, monitoring the changes in the photo until you reach the desired level of lightness of shadows. We set opacity to 20%. This brought about a significant change.
Usually maximum 25-35% is needed, since the result is very much like a drawing and less realistic.
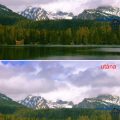
False flash
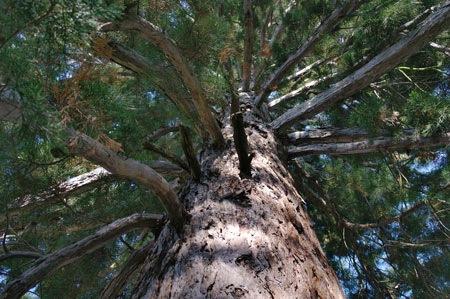
The mostly dark photo has gained a much more even lightness as if we have used flash illumination.
After merging the layers (Layer/Flatten Image) save the photo.