Surely all of you have already discovered sometimes that the brightness ratio of your camera is rather limited. This means that the shadowed areas of a finished picture are too dark while the brighter ones are too light. In case of photos taken in radiant weather and/or with a compact camera, the issue’s importance is multiplied. Photoshop CS already contains the Shadows/Highlights feature as a remedy, but of course there were (pretty numerous) solutions in earlier versions as well. This article describes a fairly simple procedure to make the shadowed areas of a picture lighter and more detailed, at least, on the level of visibility. Those who use a CS version of Photoshop are also encouraged to take a try with it as an alternative to the existing solution.
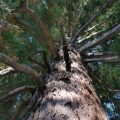
Choose the photo to be edited. Suitable subjects include landscapes taken in bright sunlight where certain picture elements are covered in dark shadows. Our sample image is one of those. The purpose of the procedure is to bring back some of the details in those areas.
Duplicate the existing layer on the Layers palette. Right-click the Background layer and click Duplicate Layer. Select the new layer and switch the blending mode from Normal to Luminosity, still on the Layers palette. This way the changes will only affect the lightness levels of the layers, but not their colors.
Click Image/Apply Image and specify the settings you see in the illustration:
(Obviously, the file name P1010148.JPG in the Source and Mask fields will be replaced by the name of your file. Don’t change that. Make sure you also select the check boxes just like in the illustration.)
You can try to leave Mask unselected. In this case, highlights will also be affected besides shadows. This lends greater dynamics to the picture, but can affect contrast rather adversely in certain situations and can thus make the photo quite dull.
Now click OK. Return to the Layers palette where you can specify the ratio of the original and the modified layer by setting Opacity. Decrease Opacity to weaken the lightening effect.
When you’re done, click Layer/Flatten Image to merge the layers. You might want to increase contrast slightly after this step.
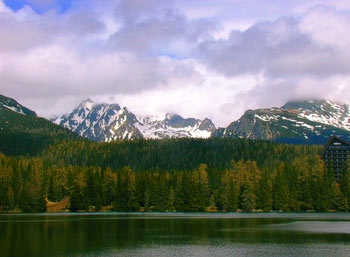
Well, here’s the result. In the second picture, the hitherto shadowy details of the trees in the remote forest became visible while the lighter areas avoided any drastic changes in lightness.
If shadowed areas are too dark and you are still unsatisfied with the result, you can repeat the procedure once or multiple times. However, the lightening of extremely dark shadows isn’t always effective and can instead significantly increase noise.
Before
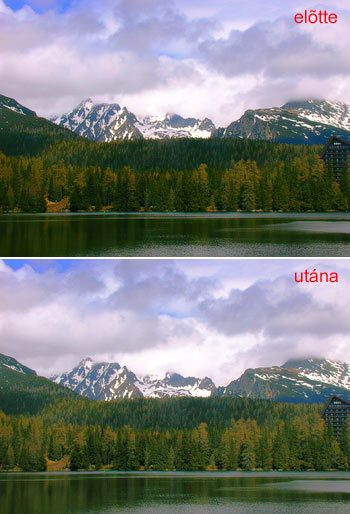
After