The previous Photoshop article described the simple controls for the Shadow/Highlight feature. Now we take a look at the more advanced options, illustrating them with an example.
Load the photo in Photoshop
The Image/Adjustments/Shadow/Highlight feature allows equalizing the lightness of different image areas in a way that only certain parts, e.g. shadows, are changed while the rest of the picture remains untouched. This was the initial photo in our previous article, but for now we darkened it even more. We want to bring out the details from the shadowed areas. Select the Show More Options check box at the bottom of the Shadows/Highlight dialog, for more controls enable a greater level of accuracy.
Advanced mode
In this case, the dialog is divided into three parts, Shadows, Highlights, and Adjustments. The first and second have been briefly discussed already, although in basic mode they only offer one slider each. Adjustments can be used to adjust the final appearance of the picture.
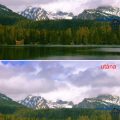
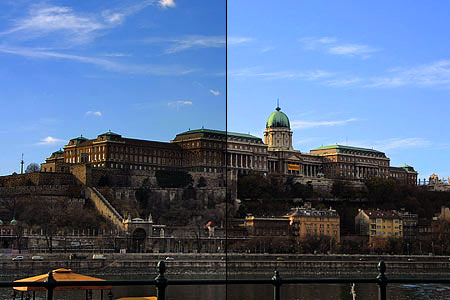
Under Shadows, the Amount slider, discussed earlier, specifies the intensity of lightening. Tonal Width controls how much of the picture the effect is applied to. Lower values apply lightening only to the darkest, near-black areas, while higher ones extend the effect to midtones, or even to highlighted areas. The picture below demonstrate the effect of a low value on the left, and that of a high one on the right.
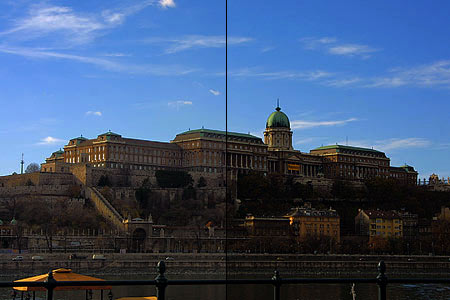
Radius controls the size and borders of affected areas. Low values apply lightening only within the borders of dark areas, while higher ones mean that the effect can be seen on larger areas outside those borders. When lightening larger areas (spots), it is recommended to use high values—lower ones can be better for tiny details. When set too low, the picture can be easily made look flat, two-dimensional. The left side in the following picture shows the effect of a low Radius value. The right side shows how high values work:
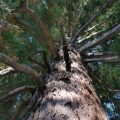
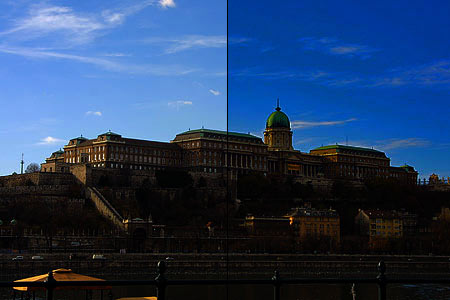
The Highlights section contains the same controls with the same (although opposite) effects. They are suitable for darkening highlighted areas.
Low Tonal Width value on the left, high one on the right:
Low Radius value on the right, high one on the left:

Under Adjustments, you can fine-tune the darkened or lightened picture. The details reappearing in lightened areas might look colorless. Color Correction can increase saturation. Behold the effect of low (left) and high values (right) below:

Midtone Contrast just does what its name suggests. Low (left) and high values (right):

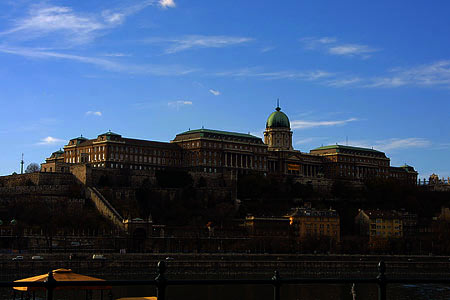
Without shadows

This is the result we achieved.