We have already done a few experiments with the selective adjustment of dark/shadowed or light/highlighted areas of photos. You may need such techniques when your camera is unable to cope with a very wide dynamics range: for example, the sky looks all right, but the landscape or a building is covered in shadows. The task is by far not an impossible one even in older Photoshop versions, our earlier articles prove it. However, from version CS on, there is a dedicated tool for this problem, called Shadow/Highlight.
Load the photo in Photoshop
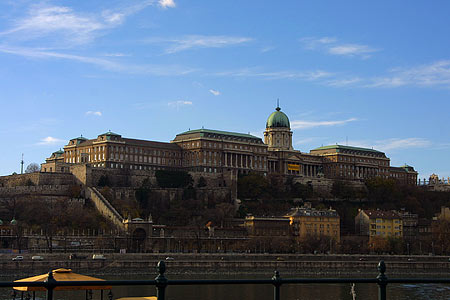
Now that’s what I mentioned above. Sky’s OK, but the building and its surroundings are rather dark, there’s way too much shadow. We want to bring back the details in the shadowed areas. If you lighten the picture the traditional way, all areas—including the sky—will become equally lighter. This can, however, result in color loss (bleaching). So it is primarily the darker areas that we want to lighten.
A shadowy menace
The task is a walk in the park with Image/Adjustment/Shadow/Highlight. The dialog contains two sliders—unless you selected Show More Options at the bottom, but we’ll discuss this option later.
Shadows Amount is for lightening darker, shadowed areas without changing lighter ones. Drag the slider to the right, and you can see that only the lightness of darker parts is increased while the sky and similarly lighter parts stay basically unchanged. We chose a setting of +30%, which worked nicely to show the details of the building and the landscape, formerly cast in shadow. Keep in mind though, that shadowed areas can contain much more picture noise and smudged details, which can be brought into view this way.
The Highlights Amount slider works just the opposite way. Use it to darken the highlighted areas, if you can. Unfortunately, Highlights Amount is unable to bring back details from parts totally bleached to white. Instead of details and colors, you will see just grayness. Drag the slider to the right to see the sky darkening. Just to show it in the article, we used a darkening of +15%.
A clear view

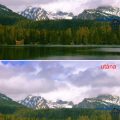
The result is a picture with much more balanced “exposition levels”.
The hidden reserves of the Shadow/Highlights tool can be revealed by selecting Show More Options. Several additional options will be displayed, enabling a more accurate and natural result. These options will be discussed in the next article.