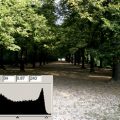
Let’s take a look another of the million different ways to increase contrast. We have already discussed the Apply Image command that can be used for such a purpose as well. This time, our aim is to enhance contrast less in the light areas and more in the dark ones. We’ll be fast as lightning and simple as a stone. Or as a contrast increase procedure.
Open the photo in Photoshop

This still life lacks a bit of contrast, although this does good to its feeling. Now try to mess it up!
Apply Image

Click Image/Apply Image. The settings in the illustration will produce good results. Blending is important here. Set it to Overlay. For a weaker contrast, use Soft Light.
Put your mask on

Stay on the Apply Image dialog. Select Mask at the bottom to activate more options. All you have to do is select Invert. The hitherto strong contrast will decrease, especially regarding the lighter areas. Using Mask and Invert enables you to control the effect of contrast increase to a certain degree. Unselecting Mask results in a strong contrast increase in all tone intervals while selecting it decreases the contrast of darker areas. Likewise, selecting Invert decreases the contrast of lighter areas and increases that of the darker ones. Feel free to play around with them!
Modestly…

…shrill does the result look. The contrast has obviously increased, but mostly in the shadowed areas, while light ones changed less.


