You want a selection with rounded corners? Nothing can be easier. Of course, the usual method in Photoshop provides a not very promising result. Luckily, there are other ways to do this. Read on. I mean, read on if you’ a pixel-niggling maximalist.
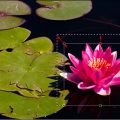
Open the photo in Photoshop
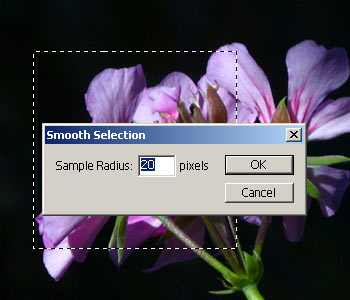
If you want rounded edges in Photoshop, you usually choose the rectangle you want with the rectangle selection tool (press M to activate), and click Select/Modify/Smooth to specify how many pixels you want hacked off. In this example, a value of 20 pixels seems to produce nice round corners. But are they really nice and round? Judging by a closer look, they aren’t.
Another way
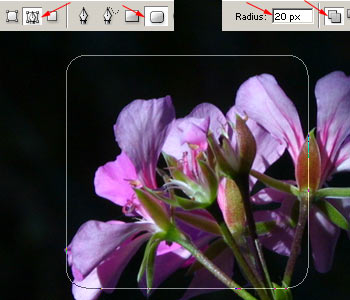
You can produce much better results if you use curves. Press U and from the options, choose the rounded rectangle indicated by an arrow (the second one from the left). This is a tool for drawing shapes, but the outline (the curve) can be easily converted to a selection. Choose the first indicated option on the left for curves, and specify a 20-pixel value here as well. Now you can select the area you want or even the whole picture. You’ll draw an outline (a curve) by doing so. The curves are outlines that can be freely shaped using the Pen tool. (Curves aren’t necessarily curved lines.) They can easily be converted to a selection.
Turning into a selection
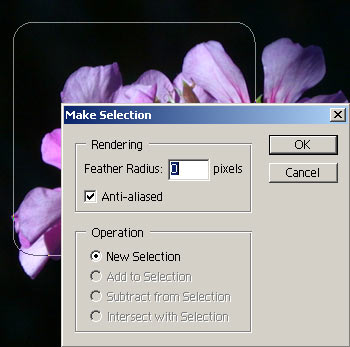
Now right-click inside the outline you drew, and click Make Selection. Specify a Feather Radius of 0. If you set a higher value, the entire selection will have a soft edge. Select Anti-aliased to have really nice and round corners!
Looks better, doesn’t it?
usual selection method / curve conversion
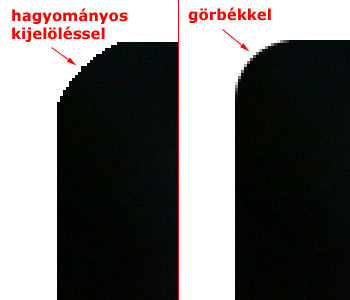
The outline you now have is much more accurately rounded. Zoom and inspect: the usual selection method provides a slight curve with jagged, poorly anti-aliased corners, while converting the curve into a selection offers a perfect arc.
Now you can use the selection any way you like for further editing work. For example, to make a simple but pleasant border, right-click inside the selection, click Select Inverse to invert the selection and press Delete to delete the areas outside the original outline. Have fun!